Horizon Culling |
While under development, the Insight3D development team wrote a series of blog posts, which are now archived here to provide in-depth technical information about some of the underlying techniques and design decisions. These posts reflect the work-in-progress state of the product at the time.
The following blog post was originally published on the Insight3D blog on April 19, 2008 by Deron Ohlarik. At the time of publishing, Insight3D was referred to by its development code-name, "Point Break".
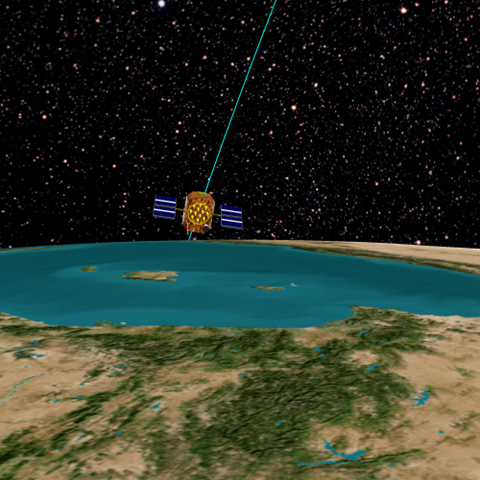
I'll discuss using a bounding sphere for occlusion culling today. The basic idea is that large objects, occluders, are likely to occlude smaller objects in a scene. In Point Break, an obvious occluder is the Earth, and satellites, ground stations, vehicles, et.al. are objects likely to be occluded. Occlusion culling applied in this manner is sometimes called horizon culling, since objects are no longer visible when they go below the horizon.
I recently read an entry in the Journal of Ysaneya regarding horizon culling that got me thinking about the topic again. (Check out Ysaneya's blog for incredible planet and space screen shots from his game under development. I know you'll be asking when we'll be able to render such amazing scenes.) We have horizon culling code that is very fast, but is sometimes wrong. For Point Break, we needed to address this.
In Figure 1, a 2D slice of 3D, you can imagine that O is the Earth and B is a very, very large satellite. In the cone method, two infinitely long cones are created. The blue cone has its apex at the viewer position, V, and fits around the occluder, O. The green cone has its apex at V and fits around the bounding sphere that is being checked for occlusion, B. If the green cone completely overlaps the blue cone and B is entirely within the dark blue of the blue cone, B is occluded, i.e., the viewer cannot see B; else, B is at least partially visible. The dark blue region is defined to be behind a plane perpendicular to VO that intersects H.
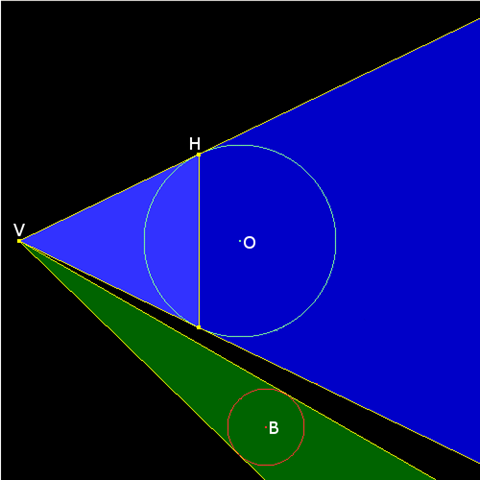
V is the viewer position. O is the occluder. B is the bounding sphere that is being checked for occlusion. H is the horizon. VH is a vector from the viewer to the horizon.
I decided to try a different method that was bouncing around my head based on comparing distances.
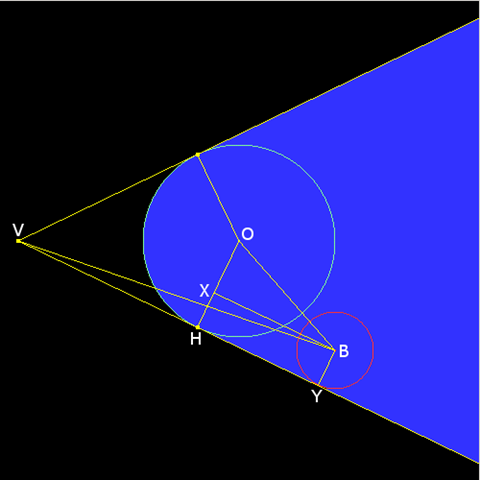
V is the viewer position. O is the occluder of radius RO. B is the bounding sphere of radius RB that is being checked for occlusion. H is the horizon. VH is a vector from the viewer to the horizon. =W= is Weezer.
In Figure 2, if any part of B is outside the blue area, B is visible. B is shown at the edge of visibility. Imagine if B rotates slightly in a clockwise direction around O; it would move closer to V and become visible. So, we need to determine the length of VB at the edge of visibility, |VB|E, and compare that to the length of VB, |VB|A, where the bounding sphere is actually positioned. If |VB|A < |VB|E then B is visible.
By the Pythagorean theorem,
|VB|E2 = (|VH| + |HY|)2 + RB2
Normally, there will be many checks of different bounding spheres against one occluder. So, some values are only calculated once and reused over many occlusion checks. The distance |VH| is one such value. Since |OH| and |VH| are perpendicular at the horizon, |VH| is calculated once using the Pythagorean theorem:
|VH| = ( |VO|E2 - RO2)1/2
|HY| is mildly tricky. Note the following:
HY and XB are parallel
XH and BY are parallel
BY and HY are perpendicular
XH and HY are perpendicular
|OX| = RO - RB
Therefore, using the Pythagorean theorem again:
|HY| = (|OB|2 - |OX|2)1/2
|HY| = (|OB|2 - |RO - RB| 2)1/2
Now all the variables are known. Bringing this all together, |VB|E2 is
|VB|E2 = (|VH| + |HY|)2 + RB2
If |OB|2 - |RO - RB| 2 is less than zero, then B is inside O and not visible. To eliminate square roots, the square of the distances are compared. If |VB|A2 < |VB|E2, B is visible.
Unlike the cone method, the distance method does not work if the occluder's bounding sphere is smaller than that of the object being tested for occlusion. This is not a major issue for Point Break, where the occluders are planets, and the objects typically under test are satellites, ground stations, vehicles, and patches of terrain. However, we do have bounding spheres for satellite orbits that are greater than the size of a planet. In this case, the code always returns that the object under test is visible as it no doubt is.
Fewer and less taxing operations means faster executing code. How does the number of math operations in this distance method compare against the cone method. I did not attempt to optimize Ysaneya's code or write my own version of that method. I did not compare the compiler optimized code. Strangely, I could not find other cone method implementations on the web for comparison. So for many reasons, my comparison is imperfect. When determining the number of operations, I did not include operations in either method that could be done once and amortized over many occlusion tests. Hopefully, I did not miscount.
Method | Additions | Subtractions | Multiplications | Divisions | Square Roots | Total Ops |
|---|---|---|---|---|---|---|
Cone | 9 | 7 | 21 | 1 | 1 | 39 |
Distance | 6 | 8 | 9 | 0 | 1 | 24 |
The additions and subtractions are on par and do not contribute much to the total processing time. The distance method does much better in regards to multiplications and divisions, which are important. Both use one square root.
I haven't seen other implementations of the cone method, but I can imagine one. David Eberly has a paper describing how to test if a cone and sphere intersect without square roots. The test would need to be modified to test for complete overlap. That test with a plane test implements the cone method and might be less computationally intensive than the tests I've described above. Lack of time has prevented further work along that line of thought.
These tests check for complete occlusion, but a partial occlusion test is also useful. If an object is partially visible, you might want to execute a more accurate occlusion test. I have modified our distance method to check for partial occlusion. The thought process is similar to that already described and requires one more square root.
Our horizon culling test is now correct. There is still more to investigate: an Eberly based solution and/or investigating the distance method math to remove the square root. For now that will have to wait. We are currently wrapping up odds and ends, writing documentation, and coding examples for the May 30th Point Break alpha release. Look forward to lots of screen shots and movies showcasing Point Break and DGL capability.
Check out the second part to Horizon Culling.