Examining the Custom Visualization Controller
Overview
Through instance data registration and listening to when the simulation time has advanced, you can create custom interactions that allow you to coordinate actions between the simulation and your analysis tools.
Prerequisites
| Prerequisite | Description |
|---|---|
| Behavior Execution Engine Installation | You must have installed Behavior Execution Engine. |
| Tutorial Project | You must start this section with either the Behavior Execution Engine simulation project from the previous tutorial or the sample provided, which you can access by following the steps below. |
Instructions
Start by opening the previous project.
- Open the System Architecture Modeler.
- Rename (or duplicate) your previously completed model or import the provided
TortoiseVsHare Part 2sample XMI file. - Create a new config file on your computer called
TortoiseVsHare Part 3.config”. - Copy and paste the snippet below into the config file.
{
    "configVersion" : "0.1.0",
    "delegateModules" : [
        {
            "identifier" : "d47862da-0861-44cb-9bad-7bf9b39103a6",
            "name" : "TortoiseVsHare Part 3 Module"
        }
    ],
    "additionalDelegateModuleSearchDirectories" : [],
    "simConfigs" : [
        {
            "name" : "Part-3 Tool Connection Version",
            "startTime" : "2000-01-01T12:00:00.000000Z",
            "stopTime" : "2000-01-02T12:00:00.000000Z",
            "targetElement" : "TortoiseVsHare Part 3::infamousRaceCase"
        }
    ]
}
These delegated action and analysis tool interactions could provide additional injection parameters to allow the tool to operate, update the analysis tool states in concert with the simulation, or reconfigure the application/tool configuration settings to ensure the current simulation state has the correct representation. In this example, you have added a GUI to visualize the state of the race. Look at the files of interest.
- Navigate to the provided delegate source directory for this lesson: <BEE Install Directory>/samples/sysml2/tutorialTortoiseVsHare/part-3/delegateSource/src/com/agi/mbse/tutorial/tortoisevshare
- Open the
TortoiseAndTheHareDelegateProviderclass in an editor.
You can see that we are now utilizing more of the delegate module’s offerings than before:
@Override
public void initialize(SimulationContext context) {
    AbsoluteTime simulationStart = context.getTimeService().getSimulationStartTime();
    try{
        Display.getMainDisplay().setEpoch(simulationStart);
    } catch (IOException ignored) {
    }
}

@Override
public void deinitialize(SimulationContext context) {
    try{
        Display.getMainDisplay().dispose();
    } catch (IOException ignored) {
    }
}
These calls give us the ability to set up and teardown our main display when the simulation starts and stops.
Another interesting addition we should look at is the call to registerSimulationTimeAdvancedListener. This call
accepts a
functional interface implementation that Behavior Execution Engine will execute after advancing the simulated universal
clock but before it processes the next discrete events at that new time. Provided in that function is an instance context
of the top-level case that is currently being executed.
codeRegistry.registerSimulationTimeAdvancedListener(context -> {
    AbsoluteTime time = context.getTimeService().getCurrentSimulationTime();
    updateDisplay(time);
});
Consider the three events highlighted below in part of the Hare state diagram. You have an absolute time trigger, a relative time trigger,
and a change trigger. In each case, when that transition triggers, the implemented onSimulationTimeAdvanced method
will be invoked and the corresponding activity on the Display class will be performed.
Highlighted Triggers in Hare Diagram
public void updateClock(AbsoluteTime time) {
    clockLabel.setText(String.format("Time " + Duration.between(epoch.toJavaInstant(), time.toJavaInstant()).toSeconds()) + " seconds");
    if (tortoiseInformation != null) {
        updateRaceStatus(time, tortoiseInformation, tortoiseGraphics);
    }
    if (hareInformation != null) {
        updateRaceStatus(time, hareInformation, hareGraphics);
    }
}
This public method in turn uses a private method updateRaceStatus to interact with the
RaceDataHistory instances for the Hare and
Tortoise to calculate the current distanceCovered for each of the runners
at the current simulation time. The advanceInRace and
setState methods serve to perform the physical updates to the GUI interface.
private void updateRaceStatus(AbsoluteTime time, RacerDataHistory racerDataHistory, RacerGraphics racerGraphics) {
    double distancePercent;
    if (racerDataHistory.getLastRecordedRacerData() != null) {
        double currentDistanceMeters = convertScalarQuantityUnitValue(racerDataHistory.calculateDistanceAtTime(time), Units.METRE);
        distancePercent = 100 * (currentDistanceMeters / totalDistanceMeters);
    } else {
        distancePercent = 0;
    }

    racerGraphics.advanceInRace(distancePercent);
    racerGraphics.setState(racerDataHistory.getStatus());

    if (racerDataHistory.isRaceFinished() && !winnerDeclared) {
        declareWinner(racerDataHistory);
        winnerDeclared = true;
    }
}
In this simple example, you can control the graphical updates for the GUI display from the delegate module as it, in turn, reacts to updates in simulation time. The GUI handles the dirty work of interacting with the delegates to obtain the status of the racers and then enact the appropriate updates to provide us a view of what is happening during the simulation execution.
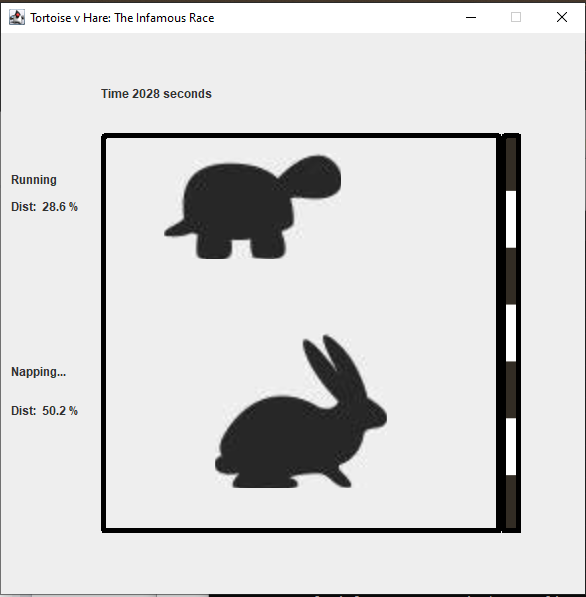
Tortoise vs Hare GUI
When building delegate modules, Behavior Execution Engine does not limit you to building a GUI or even creating and driving linkages with other tools. By using the API, you can also create additional injection dependencies allowing you greater customization and control of your simulation at the delegate level. Take some time to explore the GUI code in the Display class. Additionally, you may want to look at some of the minor additions to implemented delegates in the other class files to help facilitate the driving of the GUI.
A key aspect to understand about the change to the delegate module is that the SysML v2 model did not represent any of these changes. This is because the changes are not related to the modeling of the entities. You can update just the custom code to facilitate the run-time implementation with respect to interactions with the Display class.
Now that you finished exploring the code, compile and test it out.
- Ensure the following gradle files are in your
delegateSourcedirectory:build.gradlegradle.propertiesgradle.settings
- Open a command prompt and navigate to the
delegateSourcedirectory, where the above files are located. - Run the
gradle installtask. - Open the
TortoiseVsHare Part 3for model execution. - Select the configuration file that you created in the previous steps.
- Execute the simulation.
Finish Tutorial >