This section provides the necessary steps to create a project in Visual Studio that the Ansys Orbit Determination Tool Kit (ODTK�) application will recognize as a valid UI plugin.
- Create a new class library
- Add the COM reference
- Define class attributes
- Enable COM visibility
- COM registration
- Category registration
- Implement the IAgUiPlugin interface
- Confirm your UI plugin in ODTK application
Create a new class library
- In Visual Studio, create a new Project and select the Class Library template in your language of choice. Code samples are given in C# and VB.NET.
- The project wizard automatically creates a public class (Class1) and adds it to your project. Give the class a more meaningful name:
- Right-click the Class1.cs or Class1.vb file in the Solution Explorer and rename the file. The sample uses the name �MySampleUIPlugin".
- Visual Studio will ask if you would like to rename all references to Class1. Click Yes.
Add the COM reference
Add a reference to the library containing the AGI UI Plugins type definitions (AgUiPlugins.dll).
- In the Solution Explorer, right-click References and click .
- At the bottom right of the dialog box, click the ellipsis button.
- Go to the following location: <Install_Dir>\bin\.
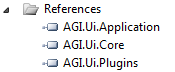
- Select Interop.AGI.Ui.Plugins.dll, Interop.AGI.Ui.Core.dll, and Interop.AGI.Ui.Application.dll. Click and then .
- In the solution explorer, under References, select the added reference and make sure the "Embed Interop Types" property is set to false.
- When you click OK, three items are added to your project references: AGI.Ui.Application, AGI.Ui.Core, and AGI.Ui.Plugins.
- Add using directives for the three AGI.Ui namespaces as well as the System.Runtime.InteropServices namespace (which promotes interaction with external type libraries):
[C#] using AGI.Ui.Application; using AGI.Ui.Core; using AGI.Ui.Plugins; using System.Runtime.InteropServices;
[Visual Basic .NET] Imports AGI.Ui.Application Imports AGI.Ui.Core Imports AGI.Ui.Plugins Imports System.Runtime.InteropServices
Define class attributes
You must define the GUID, ProgID, and ClassInterface attributes for the class.
The GUID is a Globally Unique IDentifier used to uniquely identify your component in the Windows registry. On the Visual Studio Tools menu, use the Create GUID function to generate a new GUID for your plugin.
The ProgID is a unique string used to identify your plugin to the ODTK application. AGI recommends a "MyCompanyName.MyPluginName" convention.
The ClassInterface defines whether the public methods and properties of class are exposed to COM clients. In most cases, the "None" class interface type will suffice. Use of the AgUtPlugin library requires the "AutoDispatch" type. To do this, change the ClassInterfaceType from None to AutoDispatch:
| [C#] |
|---|
[ClassInterface(ClassInterfaceType.AutoDispatch)] |
| [Visual Basic .NET] |
|---|
ClassInterface(ClassInterfaceType.AutoDispatch)> _ |
The attribute definition will resemble this format:
| [C#] |
|---|
namespace MySampleUIPlugin { [Guid("xxxxxxxx-xxxx-xxxx-xxxx-xxxxxxxxxxxx")] [ProgId("MyCompany.MySampleUIPlugin")] [ClassInterface(ClassInterfaceType.None)] public class MySampleUIPlugin { ... |
| [Visual Basic .NET] |
|---|
<Guid("xxxxxxxx-xxxx-xxxx-xxxx-xxxxxxxxxxxx"), _ ProgId("MyCompany.MySampleUIPlugin"), _ ClassInterface(ClassInterfaceType.None)> _ Public Class MySampleUIPlugin ... |
Enable COM visibility
Ensure that the types in the assembly are visible and accessible to COM components. For this example, set the ComVisible attribute to true for the entire assembly. You can override for individual types and type members in the public class.
- Expand the Properties folder in the Solution Explorer and open AssemblyInfo file.
- Locate the ComVisible attribute and set it to true:
- Save and close the AssemblyInfo file.
| [C#] |
|---|
[assembly: ComVisible(true)] |
| [Visual Basic .NET] |
|---|
<Assembly: ComVisible(True)> |
COM registration
If you are using a COM UI plugin, your plugin must expose a COM object (a COM-callable wrapper for your application) so that the plugin can communicate with the ODTK application. There are two options for registering your COM UI plugin as a COM component: use Visual Studio settings to register at build, or use the command prompt to register your plugin. Both options require administrative privileges on your computer.
To use the Visual Studio settings to register your plugin at build time:
- Right-click the project (MySampleUIPlugin) in the Solution Explorer and select Properties.
- Select the Build tab (C#) or the Compile tab (VB).
- Select the Register for COM interop check box.
- Save and build your project.
Depending on your configuration, you might get this build error:
�Cannot register assembly "<filpath>\MySampleUIPlugin.dll" - access denied. Please make sure you're running the application as administrator. Access to the registry key 'HKEY_CLASSES_ROOT\MyCompany.MySampleUIPlugin' is denied.�
If you get this error:
- Close Visual Studio.
- Open Visual Studio, but instead of a click or double-click to launch Visual Studio, right-click and select �Run as administrator.�
- Open your plugin project and build again. The �access denied� error should not appear.
The plugin only needs to be registered once, so you can clear the Register for COM interop flag and run under normal user privileges for the rest of the project.
If you are using a .NET UI plugin, you do not need to register it.
Category registration
Thee ODTK application uses an XML manifest file to discover and load plugins at runtime. Using either Visual Studio or a text editor, create a new XML file. AGI recommends naming the XML file with the same name as your plugin (MySampleUiPlugin.xml). Below are examples of the required format for COM UI plugins and .NET UI plugins. For COM UI plugins, the ProgID specified in the XML manifest must match the ProgID specified in the class attributes.
When using the PersName argument there are three options in STK 13. They are:
- STK (for the STK application)
- ODTK (for the ODTK application)
- STK;ODTK (for both applications)
COM UI plugin manifest
<?xml version = "1.0"?>
<AGIRegistry version = "1.0">
  <CategoryRegistry>
    <Category Name = "UiPlugins">
      <UiPlugin ProgID = "MyCompany.MySampleUIPlugin" DisplayName = "MySampleUiPlugin">
      </UiPlugin>
    </Category>
  </CategoryRegistry>
</AGIRegistry>
.NET UI plugin manifest
<?xml version = "1.0"?>
<AGIRegistry version = "1.0">
  <CategoryRegistry>
    <Category Name = "UiPlugins">
			<NETUiPlugin
			DisplayName="GNSS Constellation UI Plugin (Examples)"
			TypeName="GNSSConstellationPlugin.GNSSConstellationPlugin"
			AssemblyName="GNSSConstellationPlugin, Version=1.0.0.0, Culture=neutral, PublicKeyToken=null"
			CodeBase="C:\ProgramData\DeveloperKit\CodeSamples\Extend\Ui.Plugins\CSharp\GNSSConstellationPlugin\GNSSConstellationPlugin\bin\Debug">
			</NETUiPlugin>
	</Category>
  </CategoryRegistry>
</AGIRegistry>
You must save this XML file in the ODTK install directory at <Install_Dir>\Plugins. Plugins registered here will be available to all ODTK application users on this computer. You usually need administrative privileges to save/modify files here.
For more detailed information and additional options for creating the XML manifest, refer to the Registration with a plugin point (i.e. category registration) section of the COM UI Plugin Registration topic.
Implement the IAgUiPlugin Interface
The next step is to change the class to implement the IAgUiPlugin interface.
- Add a class variable to store a pointer to the IAgUiPluginSite interface:
[C#] private IAgUiPluginSite m_psite;
[Visual Basic .NET] Dim m_psite As IAgUiPluginSite
- Append the interface name to the class declaration:
[C#] public class MySampleUIPlugin: IAgUiPlugin
[Visual Basic .NET] Public Class MySampleUIPlugin Implements IAgUiPlugin
- For C#, right-click the interface (IAgUiPlugin). Select Implement Interface, then Implement Interface again. For VB, at the end of the ImplementsIAgUiPlugin line, press the Enter key.
This will implement the IAgUiPlugin interface, exposing its members.
- Edit the OnStartup method as follows:
[C#] public void OnStartup (IAgUiPluginSite PluginSite) { m_psite = PluginSite; }
[Visual Basic .NET] Public Sub OnStartup(PluginSite As AGI.Ui.Plugins.IAgUiPluginSite) Implements AGI.Ui.Plugins.IAgUiPlugin.OnStartup m_psite = PluginSite End Sub
- Edit the OnShutdown method as follows:
[C#] public void OnShutdown () { m_psite = null; }
[Visual Basic .NET] Public Sub OnShutdown() Implements AGI.Ui.Plugins.IAgUiPlugin.OnShutDown m_psite = Nothing End Sub
- Save and build the project.
The OnInitializeToolbar and OnDisplayContextMenu methods are addressed in the topic Create GUI Items in the section Add a Toolbar Button or Menu Item. The OnDisplayConfigPage method is addressed in the topic Add a Custom Config Page.
Confirm your UI plugin in ODTK application
- Launch the ODTK application.
- From the Edit menu, select Preferences.
- In the Preferences dialog box, click UI Plugins on the left.
- Locate the plugin that you just created ("MyCompany.MySampleUIPlugin") in the list of available UI Plugins. Ensure that the Active flag is selected.
The Active flag is selected when a valid UI plugin is running. If the "Active" flag is not selected, open the ODTK Message Viewer and look for any related error messages. Check that the following are true:
- The assembly is registered for COM Interop.
- The ProgID in the XML manifest matches the ProgID specified in the public class of your UI plugin.
- The XML manifest is properly formatted and saved in the proper location.