Astrogator.
The results of the tutorial may vary depending on the user settings and data enabled (online operations, terrain server, dynamic Earth data, etc.). It is acceptable to have different results.
The results of the tutorial may vary depending on the user settings and data enabled (online operations, terrain server, dynamic Earth data, etc.). It is acceptable to have different results.
Watch the following video, then follow the steps below incorporating the systems and missions you work on (sample inputs provided).In this exercise you will use a target sequence to insert a spacecraft into an orbit about Mars. To get to Mars, you will first define a heliocentric interplanetary trajectory based on orbital elements obtained from a NASA web site for the Mars Pathfinder mission, in which a spacecraft launched from Earth on December 4, 1996 landed on Mars on July 4, 1997. In the process of modeling this Mars mission, you will construct your own Mars Point Mass propagator and make use of STK's multiple 3D Graphics windows feature, which enables you to view the mission from a heliocentric and Mars-centered perspective.
Setting the Context
To set the context for your Mars mission, you will define a scenario with a satellite and two planets -- Earth and Mars -- then create two 3D Graphics windows providing heliocentric and Mars-centered views of the mission.
Designing the Scenario
- Create a scenario and name it Mars_Probe. Set a Start time of 1 Mar 1997 00:00:00.00 UTCG and a Stop time of 1 Mar 1998 00:00:00.00 UTCG.
- Open the scenario's Basic > Time properties, ensure the Epoch time of the scenario is set to the AnalysisStartTime.
- Set the Animation Step Size to 1 hr (3600 sec).
- On the scenario's 2D Graphics - Global Attributes properties page, in the Planets section, check Show Orbits and disable the Show Subplanet Points and Show Subplanet Labels.
Defining Planets
- Insert two planet objects.
- Open the Basic - Definition properties page for the first planet and set its Central Body field to Earth. Set the Ephemeris Source to DE 430, and make certain that the Auto-Rename option is selected.
- Select Mars as the Central Body for the other planet. Again, set the Ephemeris Source to DE 430 and select Auto-Rename.
Spacecraft Graphics
- Create a satellite (
 ) and rename it Pathfinder.
 - Open the Satellite's () properties (
 ).
). - On the Basic - Orbit page, select Astrogator as the propagator. You may need to expand the properties window to see all the controls.
- On the 2D Graphics - Pass page, make certain that Orbit Track Lead Type is set to All.
- On the 3D Graphics - Model page, in the Detail Thresholds area, slide the Marker, Label controls to the far right; this will move the Marker and Point slider controls as well.
3D Graphics Windows
Let's now define two 3D Graphics windows: one that gives a wide-angle view of the interplanetary cruise, and one that shows what's happening in the neighborhood of Mars.
Heliocentric View
- On the Advanced page, set the Max Visible Distance field to 1e+010 km.
Mars-Centered View
- Extend the View menu.
- Select Duplicate 3D Graphics Window -> 3D Graphics 1 - Sun.
Finishing Up
- Select the 3D Graphics 1 - Sun window again.
- Click Orient from Top (
 ).
). - Click Orient North(
 ).
). - Zoom out and adjust the angle of the view so that the Earth, Mars, and Sun are all visible in the window.

Getting to Mars
In modeling interplanetary missions with Astrogator, you will frequently begin with a launch from Earth or by defining a geocentric parking orbit. In this exercise you will bypass that phase and start with a "snapshot" of the spacecraft in mid-mission.
Defining the Initial State
The heliocentric orbital elements you'll use here define the size, shape and orientation of the Mars Pathfinder's interplanetary trajectory as of March 1, 1997, when it had been underway for about three months.
- Open the satellite's () properties ().
- If the default MCS doesn't already begin with an Initial State segment, insert one at the beginning of the MCS.
- Click the ellipsis (
 ) button next to the Coord. System field. Select Sun and choose J2000 as the Coordinate System. Click OK.
 - Select Keplerian as the Coordinate Type.
- Set the Orbit Epoch to 1 Mar 1997 00:00:00.000 UTCG.
- Enter the following orbital elements:
| Element | Value |
|---|---|
| Semimajor Axis | 193216365.381 km |
| Eccentricity | 0.236386 |
| Inclination | 23.455 deg |
| Right Ascension of Ascending Node | 0.258 deg |
| Argument of Periapsis | 71.347 deg |
| True Anomaly | 85.152 deg |
Propagating the Interplanetary Trajectory
- If the second segment of the MCS is not already a Propagate segment, insert one in that position.
- Select Heliocentric as the Propagator.
- Click Advanced... and disable the Use option for Maximum Propagation Time.
- Insert Periapsis in the Stopping Condition list and remove Duration.
- In the Central Body field (which appears when certain stopping conditions, such as periapsis, are selected), ensure Sun is selected.
- Run the Mission Control Sequence to see how close your spacecraft has come to Mars.
You are using a heliocentric propagator and defining periapsis with reference to the Sun because the spacecraft is in the heliocentric transfer phase of the interplanetary voyage, where the predominant gravitational force is that of the Sun.
The Sun View shows that the spacecraft's trajectory intersects the orbit of Mars:
If spacecraft trajectory and planet orbits do not display in the selected colors, open the MCS Options window and make certain that the Draw Trajectory as it is Calculated in the 3D Graphics window and Use Trajectory Segment Colors options are selected.
The 3D Graphics 2 - Mars window shows that your spacecraft comes very close to Mars indeed -- so close that its trajectory curves under the influence of Mars' gravity. Click Orient from Top () and zoom out to get a good view:
Now change the perspective to a "side view" (i.e., about 0 deg center latitude). You'll see that your spacecraft's trajectory is substantially coplanar with the orbit of Mars.
Martian Orbit
Of course, your object is not to shoot past Mars but to stop there and drop into orbit. The following steps provide one way to accomplish that goal.
Stopping Near Mars
- Return to the Propagate segment and, in the Central Body field, change the central body to Mars .
- Run the MCS again and look at the 3D Graphics windows -- you'll see that the spacecraft stops quite close to Mars.
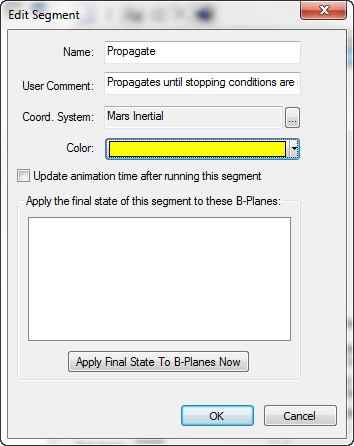
- Return to the Propagate segment and double click it to open its properties window. Set Mars Inertial as the new coordinate system for the segment by clicking the ellipsis () button next to the Coord. System field, and select Inertial from the Mars folder.
- Create an Summary and scroll down to the entry for Altitude: the spacecraft comes roughly within 1776 km of the Martian surface.
- Near the top of the summary, look at the date under 'Stopping Condition Information'. Recall that the Pathfinder probe landed on Mars on July 4, 1997.
You're still using periapsis as the stopping condition, but defining it with reference to Mars rather than the Sun.
Drop into Orbit
You're almost ready to use the targeter to drop into Mars orbit. First you need to create a propagator that uses Mars as the central body.
Creating a Mars Point Mass Propagator
- Launch the Component Browser from the Utilities menu.
- Highlight the Propagators folder in the Component Browser and select Earth Point Mass from the options that appear.
- Click Duplicate and name the copy Mars Point Mass.
- Double-click the new propagator and, on the Propagator Functions page, change its Central Body to Mars.
- Close the Component Browser.
Targeting a Circular Orbit
- Add a Target Sequence segment to the MCS after the Propagate segment.
- Nest a Maneuver in the Target Sequence.
- Make certain that Maneuver Type is set to Impulsive, and set Attitude Control to Thrust Vector.
- Make certain that VNC(Mars) Thrust Axes and the Cartesian vector type are selected.
- Select the X and Z components as independent variable.
- Click Results... and select Keplerian Elements > Eccentricity as the sole dependent variable. In the Component Details area, select Mars as the Central Body.
- With the Target Sequence segment selected, click Properties... to open the Variables page for the Profile.
- Select the Use option for both independent variables (Control Parameters)
- ImpulsiveMnvr.Cartesian.X
- ImpulsiveMnvr.Cartesian.Z
- Select the Use option for the dependent variable (Equality Constraint).
- Eccentricity
- Leave the Desired Value for Eccentricity at its default value of zero, but change Tolerance to 0.01.
- Display the Convergence page and set the Maximum Iterations value to 50. Click OK to close the Properties window for the Profile.
- Set the Profile Mode to Iterate.
- Turn on the Targeter by changing the Action to Run active profiles.
- Run the MCS
Propagating the Orbit
- Add another Propagate segment to the MCS, after the Target Sequence.
- Insert Periapsis as the sole Stopping Condition, with Mars as the Central Body.
- Enter a Repeat Count of 2 (to ensure that the spacecraft completes at least one full orbit pass).
- Change the Propagator to Mars Point Mass (the component you created).
- Run the MCS and look at the 3D Graphics 2 - Mars window:
If you use the mouse to adjust the perspective, you'll see that your spacecraft has entered into a circular orbit around Mars.
 Visit AGI.com