Part 14:
STK Pro, STK Premium (Air), STK Premium (Space), or STK Enterprise
You can obtain the necessary licenses for this tutorial by contacting AGI Support at support@agi.com or 1-800-924-7244.
This lesson requires version 13.0 of the STK software or newer to complete in its entirety. If you have an earlier version of the STK software, you can view a legacy version of this lesson.
Capabilities covered
This lesson covers the following capabilities of the Ansys Systems Tool Kit® (STK®) digital mission engineering software:
- STK Pro
- STK Integration
Problem statement
Developer, engineers, and operators want to analyzing the behavior of a satellite when it has contact with a ground site. The task will be repetitive, they want to consider methods of automating the process and extracting the data. Knowing that you can integrate the STK software with other tools, you decide to explore the integration process.
Solution
Analysis in the STK application can be automated with code. Using the STK software's Integration capability, you decide to run the process with Python. Using the resources available in the STK Programming Help and Github, you will explore how to model a mission with a script.
What you will learn
Upon completion of this tutorial, you will be able to:
- Connect the STK application to a programming interface
- Build a mission through a script
- Extract data from the STK software
A PowerPoint Presentation accompanies this lesson. It is recommended that you review the presentation while performing the tasks.
Prerequisites
Before starting this lesson, verify that you have a working environment for running the Python code and have installed the STK Python API.
- Confirm you have a working Python environment and a Python interpreter.
- See Getting Started for details.
- Recommended interpreters are VS Code, Spyder, Jupyter Notebook / JupyterLab, etc.
- Install the STK Python API.
- See Getting Started with the STK Python API for details.
- Close any open or background STK scenarios, as this script will launch a new mission.
The STK Python API is only available with version 12.1 of the STK software or newer. The install wheel (.whl) file is included with your STK software installation. If it is not already installed, use pip to install it. An example Windows console command is below:
pip install "C:\Program Files\AGI\STK_ODTK 13\bin\AgPythonAPI\agi_stk<..ver..>-py3-none-any.whl"
If you are using an older version of the STK software, then use the win32com or comtypes module.
Using the STK Programming Help
Before attempting to code anything, take a moment to familiarize yourself with the STK Programming Interface Help system.
Historically, integrating the STK Desktop application and STK Engine was achieved with either the win32com or the comtypes Python module. In version 12.1 of the STK software, AGI developed a Python API to provide the following:
- Cross-platform support: For both Windows and Linux, you can employ code written using the Python API interacting with STK Engine without modifications, assuming that you follow the usual cross-platform Python guidelines.
- Usability improvements:
- The API provides definitions for all enumerations. With the win32com module, enumerations had to be defined manually based on the corresponding numerical value.
- You get better integrated development environment (IDE) support through type hints, based on the typing module.
The Python API has also been expanded to support STK events and to expose the globe and map controls, enabling you to develop custom applications in Python.
Resources for integrating with the STK software are available both online and locally, if installed with the STK software installation. You can access these in several different ways:
- Go directly to the online STK Programming Help page: help.agi.com/stkdevkit/index.htm.
- Launch the STK Programming Help from within the STK application: Select Help on the menu bar and select Programing Interface Help.
- Launch the STK Help via the Windows Start Menu: Select Start > AGI STK_ODTK 13 > STK 13 - Programming Interface Help.
You will find a wealth of information within the STK Programing Interface Help system, including integration tutorials, code snippets, decision trees, and library references.
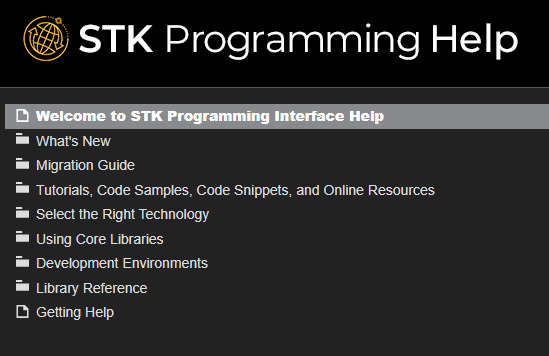
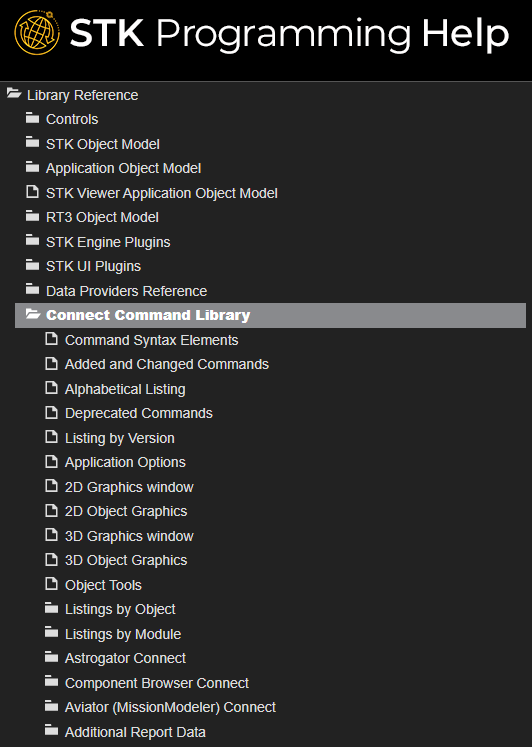
The help system tree looks like this:
Under the Using Core Libraries help topic, you will find additional information on using the STK Object Model and Connect.

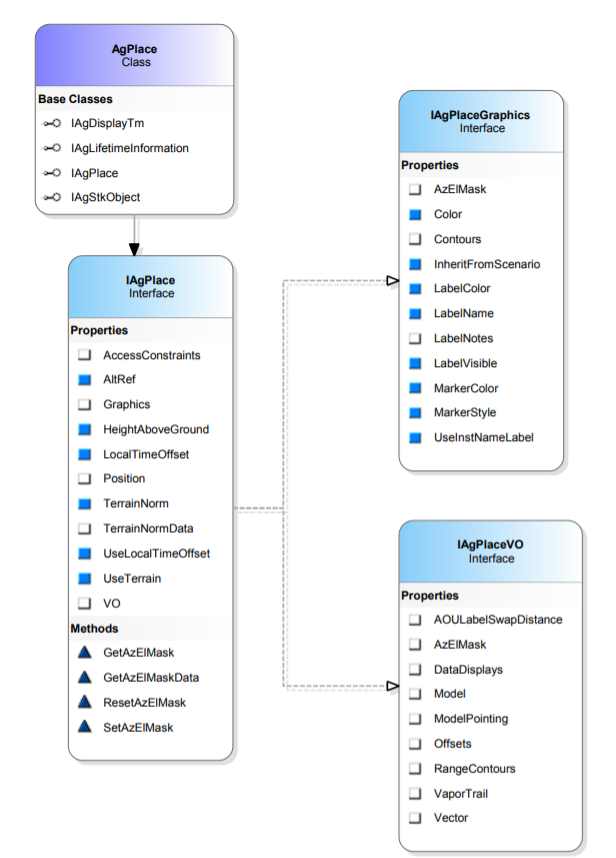
The STK Object Model help topic listed under Using Core Libraries contains useful code snippets in various programming languages. It also contains information on the various COM libraries that make up the STK Object Model. This information includes useful diagrams that help visualize how the STK Object Model is structured.
In the Connect section of the Using Core Libraries help topic, you will find useful Getting Started information outlining the basics of Connect commands and response formats. The section also contains useful code snippets that demonstrate the syntax for various Connect commands.
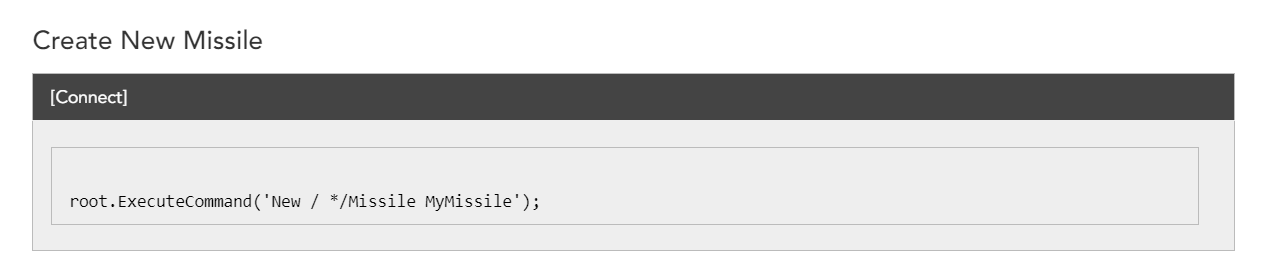
This snippet utilizes the STK Object Model to send the Connect command. The raw Connect command ('New / */Missile MyMissile') is the string being passed through the ExecuteCommand method.
You should explore more of the help sections, but one last important section to point out is the Library Reference section.
Under the Library Reference help topic, you will find documentation on the STK Object Model, the Connect Command Library, Data Providers, and more. The STK Object Model documentation is organized by the individual libraries, so there is a section for STK Objects, a section for STK Util, and so on, with each section encapsulating certain aspects of functionality. Within each section items are broken down further by their type. When needed, this can make it quicker to find the exact item you are looking for.
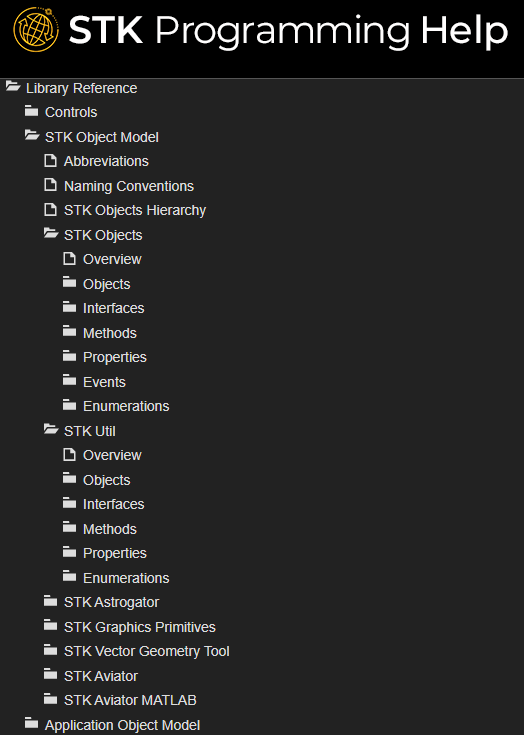
The Connect Command Library section, listed under Library Reference help topic, houses the documentation for all of the Connect commands. In this case commands are listed in several different formats, including alphabetically, by object, and by capability, to assist in locating the exact reference needed.
Trying it out
To find help for the AgStkObjectRoot class:
- Click Library Reference > STK Object Model > STK Objects.
- Scroll down the alphabetical list until you find the AgStkObjectRoot entry.
- Click the AgStkObjectRoot link to reveal detailed information and other important links, including a link to the IAgStkObjectRoot interface.
From there, you can access a listing of all the members (methods and properties) of the interface associated with the AgStkObjectRoot object. Similarly, you can find help for any other object or interface, as well as any method, property, or enumeration.
A quick way to find help on a given type is to use the Search tab of the Help system. For example, suppose you are interested in the AgECoordinateSystem enumeration. If you enter "AgECoordinateSystem" in the search field and click List Topics, a list of pages containing that term appears. The entry for the AgECoordinateSystem help topic page will appear at the top. Select that entry to display a page defining the enumeration and listing its members.
Using the STK Programming Help in context
In addition to help on programming issues, the help provides information about the real-world context in which the application is to be used. For example, the STK Object Model help page for the SpinAxisConeAngle property tells you that it is writable, is of the Variant data type, and belongs to the IAgSnPtSpinning interface. In addition, it tells you that the property represents "the cone angle used in defining the spin axis; that is, the angle between the spin axis and the sensor boresight." This latter information is useful in deciding whether or not and how to use the property in your application, but since the help is mainly intended to provide guidance on programming issues it is best to also reference the STK Help System, where there is generally more information. For example, the help page for "Spinning Sensor Pointing" not only gives more detailed context information, but also includes a drawing of spin axis geometry that illustrates the spin axis cone angle quite clearly.
The STK Programming help has many object-specific Python code snippets to assist you. Additional Python Resources are available on Github.
This lesson was written using Python 3.10, but you can also use other versions of Python. See
Launching the code
Copy the starter script from the STK install and open it in your preferred interface.
- Using File Explorer, browse to the location of the script file located at <Install Dir>\Data\Resources\stktraining\scripts\Python_STK_Training.py.
- Copy the Python_STK_Training.py file.
- Paste the Python_STK_Training.py file in your preferred accessible location.
- Close File Explorer.
- Use your preferred method to open the Python_STK_Training.py file.
If you don't want to use the Python script file to complete this tutorial, you can enter your commands right in a Python command window. Optionally, you can also use the Jupyter Notebook file at <Install Dir>\Data\Resources\stktraining\scripts\Python_Jupyter_STK_Training.ipynb. For using the .ipynb file, please open a new STK scenario so the script can connect to it.
Using the script
The Python script file contains the completed script needed for this tutorial. You can run the script in its entirety, however, it is recommended that you read through each block and run them one at a time to understand the structure and functionality of the various commands.
- Click into the individual cell of code.
- Run the cell (for example, Shift + Enter in VS Code) or a right-click context menu option (for example, "Run Selection/Line in Python Terminal").
- Follow the steps as outlined.
Setting up your workspace
With the STK Python API, you can import packages.
- The first cell of your script contains the import statements needed to run the STK scenario on the desktop and insert STK objects.
- Start the STK application instance. Use the appropriate script below depending on how you want to connect to the STK application:
- Grab a handle on the STK application root:
- Check that the root object has been built correctly and check the type:
- Once the above sections are run in the script, it will create a new STK application window.
# Set up your Python workspace
# Note: The STK Python API used in this lesson is only available with STK 12.1 or later.
# If not already installed then use pip to install it:
# pip install agi.stk<..ver..>-py3-none-any.whl
# If you are using an older version of STK, then use win32api or comtypes


from agi.stk13.stkdesktop import STKDesktop
from agi.stk13.stkobjects import *

# If you are using the STK/Astrogator® capability, uncomment the below:
# from agi.stk13.stkobjects.astrogator

# If you are using the Aviator capability, uncomment the below:
# from agi.stk13.stkobjects.aviator

# Python helper library imports
# import os

# In the next section you will start the STK application.
# NOTE for the Ansys Systems Tool Kit® (STK®) Cloud(TM) web browser-based
# digital mission engineering software:
# you can change your script to connect to an active instance
# instead of creating a new instance of the STK application.

# Connect to an instance of the STK application:
# stk = STKDesktop.AttachToApplication()

# Create a new instance of the STK application:
# Optional arguments set the application visible state and the user-control
# (whether the application remains open after exiting python).

stk = STKDesktop.StartApplication(visible=True, userControl=True)

# Check your Task Manager to confirm that the STK application was called.
Use the STK_PID environment variable when you have multiple instances of the STK application running:
STK_PID = os.getenv('STK_PID')
stk = STKDesktop.AttachToApplication(pid=int(STK_PID))
root = stk.Root
Recall that the AgStkObjectRoot object is at the apex of the STK Object Model. The associated IAgStkObjectRoot interface provides the methods and properties to load or create new scenarios and access the Object Model Unit preferences. Through the Connect command, you have a pointer to the IAgUiApplication interface; however, the STK Python API provides a direct handle to the IAgStkObjectRoot via the Root property in STKDesktop or the NewObjectRoot method in STKEngine.
type(root)
The output should be agi.stk13.stkobjects.AgStkObjectRoot.
Connecting to the STK application instance and designing a new scenario
Now that you have launched the STK application via the Python scripting interface, connect to the application instance to create a new scenario and analysis period and to reset the animation time.
- The next task is to create a scenario via the NewScenario method of the IAgStkObjectRoot interface. According to the documentation, the NewScenario method expects to be passed a string representing the name of the scenario, but does not return anything.
- Run the following code to set the analysis period:
- Run he following code to reset the animation time:
# 1. Define a Scenario object.

root.NewScenario("Python_STK_Training")
scenario = root.CurrentScenario
# 2. Set the analytical time period.

scenario.SetTimePeriod('Today','+24hr')
# 3. Reset the animation time to the newly established start time.

root.Rewind()
Inserting and Configuring objects
With a new scenario created, it's time to populate the scenario with objects. Use the STK Python API and the STK Connect commands, via the ExecuteCommand method, to create a facility and a LEO satellite.
- Run following code to add a target object to the scenario:
- Run following code to move the target object to the desired location:
- Run the following code to add a satellite object to the scenario. Take a moment to create a LEO satellite using Python and STK Connect commands, via the ExecuteCommand method:
- Examine the Connect command below before running. In it, you will be using the Set State Classical connect command. Rather than manually setting the times, you will use the defined scenario times. First, print them to confirm:
# 1. Add a Target object to the scenario.

target  = AgTarget(scenario.Children.New(AgESTKObjectType.eTarget,"GroundTarget"))
Casting the object returned from the New method allows for better IntelliSense in your integrated development environment (IDE), but is optional; the object returned will be AgTarget at runtime even without the case.
# 2. Move the Target object to a desired location.

target.Position.AssignGeodetic(50,-100,0)
# 3. Add a Satellite object to the scenario.

satellite  = AgSatellite(root.CurrentScenario.Children.New(AgESTKObjectType.eSatellite,"LeoSat"))
print(scenario.StartTime)
print(scenario.StopTime)
Then run the code to execute the command:
# 4. Propagate the Satellite object's orbit.

root.ExecuteCommand('SetState */Satellite/LeoSat Classical TwoBody "' + str(scenario.StartTime) + '" "' + str(scenario.StopTime) + '" 60 ICRF  "' + str(scenario.StartTime) + '" 7200000.0 0.0 90 0.0 0.0 0.0')
Computing access between objects
Now that the scenario is fully built, the final task is to extract data and perform a basic analysis. You have a scenario with a Target object and a Satellite object. Determine when the Satellite object can access the Target object. For practice, locate the code to compute an access between two STK Objects using the IAgStkObject interface HINT: Review the
- Go to the STK Programming Interface Help files.
- Locate the code needed to compute an access between two STK objects using the IAgStkObject interface. The access is between the Satellite object and the Target object.
- If you cannot locate the code, expand the following:

Retrieving access data and satellite altitude data
The final task is to extract data and perform a basic analysis. You have just computed access between the two objects, so you can use the STK data providers to pull data out of the scenario.
- Retrieve and view the access data in Python:
- Retrieve and view the altitude of the satellite during an access interval. Run the following code to call to the satellite's LLA State data provider:
accessDP         = access.DataProviders.Item('Access Data')

results          = accessDP.Exec(scenario.StartTime, scenario.StopTime)

accessStartTimes = results.DataSets.GetDataSetByName('Start Time').GetValues()

accessStopTimes  = results.DataSets.GetDataSetByName('Stop Time').GetValues()

print(accessStartTimes,accessStopTimes)
This will retrieve and view the access data in Python.
You can also pull the Start and Stop times in Python using the following lines of code:
accessIntervals = access.ComputedAccessIntervalTimes

dataProviderElements = ['Start Time', 'Stop Time']

for i in range(0,accessIntervals.Count):
	times = accessIntervals.GetInterval(i)
	print(times)
More information is available in the STK Object Model Tutorial.
satelliteDP        = satellite.DataProviders.Item('LLA State')

satelliteDP2       = satelliteDP.Group.Item('Fixed')

rptElements        = ['Time', 'Lat', 'Lon', 'Alt']

satelliteDPTimeVar = satelliteDP2.ExecElements(accessStartTimes,accessStopTimes, 60, rptElements)

satelliteAltitude  = satelliteDPTimeVar.DataSets.GetDataSetByName('Alt').GetValues()

print(satelliteAltitude)
In the above lines, note how the data providers must follow the structure of data provider folder, subfolder, and selection.
Saving your work
You have just completed the Integrating STK with Python tutorial. Don't forget to save your work.
- To save your scenario, run the following code to create a new directory and then tell Python to save all the scenario files there:
- Run the next lines to use your custom path to save the scenario files:
import os
os.mkdir('Python_STK_Training')
This will create a new folder named Python_STK_Training at the same level as your .py script.
If you are entering your Python commands directly through a command-line interface, this folder will be created in the directory out of which your Python interpreter is being run (for example, C:\Program Files\Python310). If however you are running your commands through a Python script, the new folder will be created in the same directory as your script. You should always pay close attention to where and how you are running things in your Python environment.
imdirectory = os.getcwd() + "\\Python_STK_Training"
root.ExecuteCommand('Save / * \"' + directory + '\"');
With your scenario safely saved, you can close out of the STK application.
Summary
You can expand and automate workflows like those used in this tutorial to quickly build scenarios and analyze missions.