Start by opening a scenario in STK. Turn on the Movie Timeline toolbar, if it is not already visible.
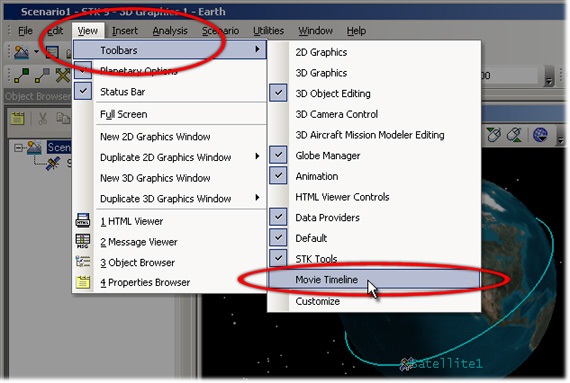
Click on the "View" menu, and look for a menu option called View->Toolbars->Movie Timeline. If this option is in the menu, but there is no checkmark next to it, select it from the menu to turn on the Movie Timeline toolbar. If the toolbar isn't mentioned in the View->Toolbars menu, see Troubleshooting.
The toolbar has eight buttons, most with a gray filmstrip across the bottom. The left-most button has a blue knob on it, and if you hover over it, the tooltip should say "Open the Movie Timeline".
Click the leftmost button to open the timeline window. Since this is the first time the window has opened for this scenario, a two-page wizard will pop up to ask some questions about the nature of the timeline being created.
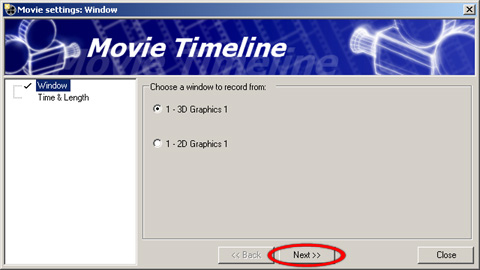
The first page asks which STK window is being recorded from.
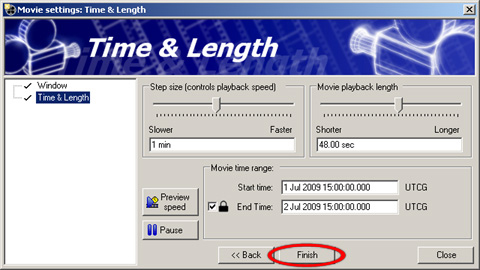
The second page asks for your first guess at the length of the movie being created. If you don't know the answer to the second page, just accept the defaults, and there will be many opportunities to edit and review the animation settings before recording your first movie with this plugin.
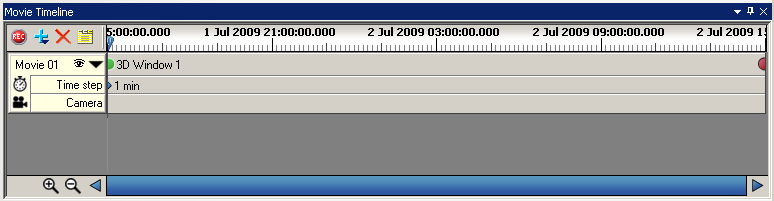
After completing the wizard, the main timeline is displayed. There are a number of interactive elements on the timeline window.
- Click and drag anywhere in the white bar with the tic marks to control STK scenario time.
- Drag the green or red handles at either end of the timeline to control when the movie begins and ends. Position the start and end times to surround the action of interest in your scenario.
- Zoom in or out on the timeline by clicking the magnifying glass icons at the bottom left. For a smoother zoom, select the desired direction (
+for zoom in,-for zoom out), and click and drag the desired button to the right.
- When zoomed in, the blue bar at the bottom indicates relative position, and can be manipulated with the mouse. The left and right arrows on either end can be clicked and dragged for smooth scrolling.
- Click and drag the thin bar just to the left of the white timecode track, to adjust the width of the header block, revealing longer track names that may be written there. This is primarily useful for object tracks, described later in this documentation.