How To Wrap an STK Scenario
Wrapping a scenario with the STK ModelCenter Plugin is a three-step process:
- Launch the plugin.
- Specify desired variables.
- Close the plugin.
1. Launch the plugin
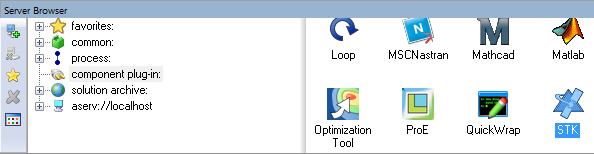
You instantiate the STK ModelCenter Plugin by dragging the plugin from the component plug-in folder of the Server Browser to an open model.
2. Specify desired variables
When the plugin is first instantiated, Analyzer will present you with the dialog box below. To add variables, first select the STK object you wish to add variables from in the tree on the left of the control. If the STK object is concrete, like a satellite or sensor, you can select which properties of the object you'd like to add from the "STK Property Variables" section in the top-middle of the dialog box. If instead the STK object is a computed quantity, such as Access, you can select which properties of the object you'd like to add from the "DataProvider Variables" section in the bottom-middle of the dialog box. Once added, the variables will appear in the "Analyzer Variables" section on the right of the dialog box.
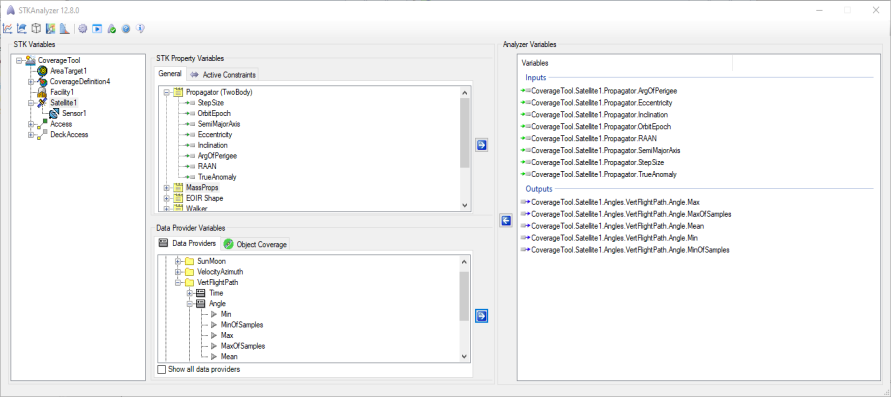
To get Data Provider values in arrays, select the Values parameter; this will add the parameter Step Size to the inputs. If you add another Values parameter from the same data provider, you will not get an additional Step Size input. However, if you add another Values parameter from a different data provider, you will get an additional Step Size input for that provider. If you remove all the output parameters from a given data provider, Analyzer will remove the corresponding Step Size parameter, as that is not needed for the statistics parameters (Min, Max, etc.).
3. Close the plugin
To import variables into your model, click . If during the import process the Plugin cannot query certain information from the scenario, Analyzer will prompt you to supply that information. Once the import process is complete, you can access STK data in ModelCenter just as you can for any other component.