STK Enterprise
You can obtain the necessary licenses for this tutorial by contacting AGI Support at support@agi.com or 1-800-924-7244.
Capabilities covered
- Test and Evaluation Tool Kit (TETK)
- STK Pro
Using the Data Importer to load ownship data
- Click the Data Importer (
 ) icon in the Test and Evaluation Tool Kit toolbar.
 - Under Import from File, click . Browse C:\Program Files\AGI\STK_ODTK 13\Help\STK\TeTraining\Training files open the Ownship.csv file.
- The Ownship.csv file contains columns of data. You can open up the file in Excel to view the data. This file contains information like Time, Latitude, Longitude, Altitude, Heading, Pitch, Roll, etc. from the ownship flight data.
- In the Select Analysis Object window, leave the default settings. You will use the XF1_0123 identifier for our sample ownship aircraft. Notice in the Time Column that Time (ISO-YD) is selected as a Time mapping. You imported this Time Mapping from the previous step. In this case, the data has absolute time stamps so you can accept the defaults.
You are telling the Ansys Test and Evaluation Tool Kit (TETK)™ capability which column represents which property in the Ansys Systems Tool Kit® (STK®) digital mission engineering software through the Data Mapping tool.
Create a new TSPI mapping for the ownship data
Since this is the first time loading this Ownship data source, the mapping is not selected in the pull-down menu.
- Click the plus icon (
 ) next to the TSPI Mapping field.
 - Set the TSPI Mapping Name to Sample_Ownship.
- In the Ownship.csv category, you will see a list of all columns from the data source. You want to assign the data elements to the corresponding STK properties on the right.
- Click Time (ISO-YD) and then the blue arrow button to add it to the Time property.
- Add Latitude, Longitude, and Altitude_MSL in the same way as before.
- Click the Attitude Data (Optional) tab.
- Specify the Attitude Reference Frame by clicking
 .
. - Double-click XF1_0123 > NorthEastDown frame.
- Add the Time (ISO-YD), Heading (Yaw), Pitch, and Roll to their respective properties.
- Click to close the TSPI mapping window.
You can also double-click the data element on the left and it will quickly populate the next available property.
Verify that you are adding the MSL altitude. There is an Altitude Reference section where MSL is the default selection. The other altitude data element is in reference to the WGS84 ellipsoid.
All other properties are optional, so you can leave them unassigned.
Finalizing the ownship
- Back on the Select Analysis Object window, click .
- Click to Update Scenario Analysis Period. You want to set our current scenario time period at the time of our ownship state.
- Click to the Data Import Successful dialog box.
- Close the Data Source Importer window.
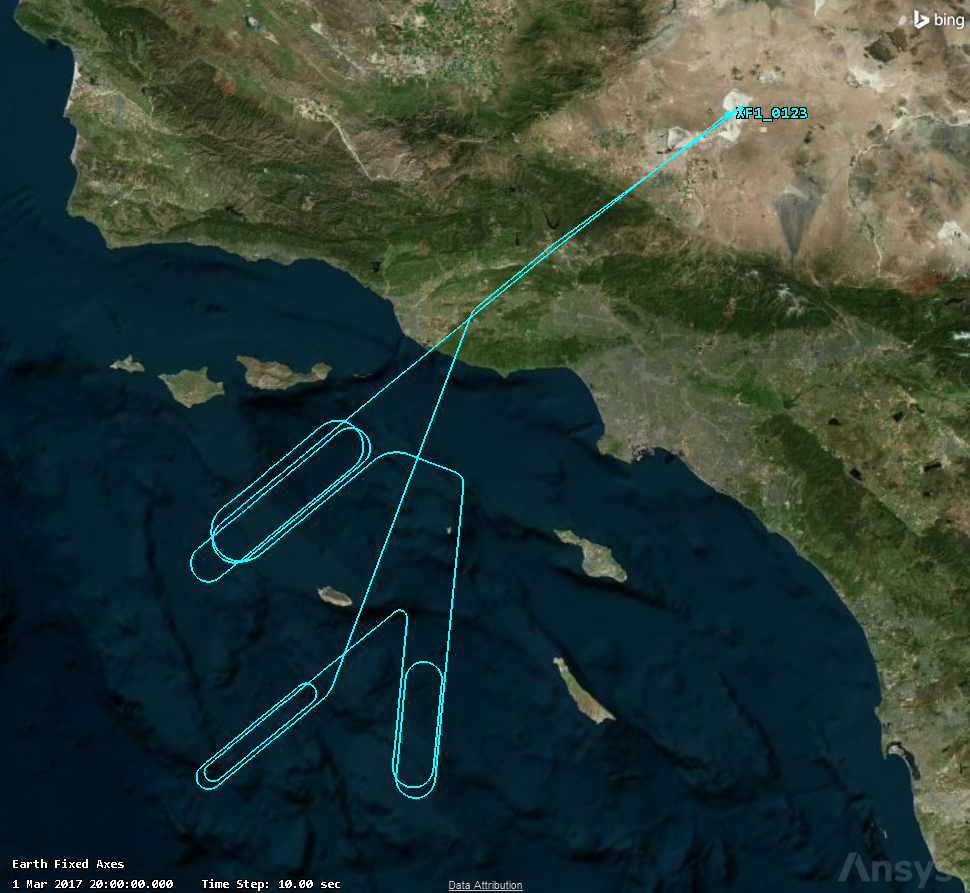
- Zoom-in on the 3D Graphics window and you will see the aircraft ready to takeoff from Edwards Air Force Base. You may have to wait a moment for the streaming imagery and terrain to catch up. You will notice that the aircraft model is the default aircraft in the STK application.
- Change the 3D model by opening the XF1_0123 Properties. Select the 3D Graphics - Model page. Click the ellipsis icon next to the Model File option. Select an aircraft model, e.g. f-35_jsf_cv.glb.
- Zoom-out on the 3D Graphics window. The aircraft takes off from Edwards Air Force Base and does a few various racetrack holding patterns. You will focus on two main tests conducted by the aircraft during its flight in the steps that follow.
- Save your scenario.
You should now see the XF1_0123 aircraft in the Object Browser and the Flight Analysis Tool.
If you do not see the Flight Analysis Tool, you can open it by clicking the  button in the Test and Evaluation Tool Kit toolbar.
Setting T&E Tool Kit default settings
- Click Edit > Preferences....
- Click Test and Evaluation Tool Kit.
- Under Default Ownship TSPI Mapping, click the add button (). Double-click the Sample_Ownship mapping you just created. You will now see it listed. Now, anytime you load a data source that is formatted the same as Sample_Ownship mapping, it will automatically be used to create the analysis object.
- Under the Switching Preferences section, click the add button ().
- Under Starts With..., type XF and click the ellipsis (
 ).
). - Browse to C:\Program Files\AGI\STK_ODTK 13\STKData\VO\Models\Air and select the f-35_jsf_cv.glb file.
- Click the add button ().
- Browse to C:\Program Files\AGI\STK_ODTK 13\Help\STK\TeTraining\Training files.
- Click .
Now, set a default 3D model.
Every aircraft that begins with XF will now use the F-35 3D model.
Under Data Directories, you can specify a folder where the TETK capability will automatically look to for data sources. You do not need to copy data sources from scenario to scenario. All TETK scenarios will point to this folder for data.