STK Premium (Air), STK Premium (Space), or STK Enterprise
You can obtain the necessary licenses for this tutorial by
This tutorial requires version 12.9 of the STK software or newer to complete in its entirety. If you have an earlier version of STK, you can view a legacy version of this lesson.
The results of the tutorial may vary depending on the user settings and data enabled (online operations, terrain server, dynamic Earth data, etc.). It is acceptable to have different results.
Capabilities covered
This lesson covers the following capabilities of the Ansys Systems Tool Kit® (STK®) digital mission engineering software:
- STK Pro
- Analysis Workbench
- STK Integration
Problem statement
Engineers and operators need to customize their mission or their analysis. They can use plugins to meet that need.
Solution
Native Python plugin points have been added to the STK application for Access constraints and for the Vector Geometry Tool (VGT) calc scalar. The Python plugin points allow you to specify a Python file to be used as a plugin. The benefit is that you do not have to worry about COM registration of the Active Scripting engine. In this lesson, you will use two installed example scripts to explore this new feature.
What you will learn
Upon completion of this tutorial, you will be able to:
- Navigate to and explore the example .py files
- Assign a plugin script as an access constraint
- Assign a plugin script in the STK software's Analysis Workbench capability
- Use plugins in scenario analysis
Requirements
Refer to the Python System Requirements for the STK application section of the Installing Python topic for what is required to use the Python plugin points.
Video guidance
Watch the following video. Then follow the steps below, which incorporate the systems and missions you work on (sample inputs provided).
Exploring installed Python plugin files
Files for this lesson are available in the STK software installation directory.
- <Install Dir>\CodeSamples\STKCodeSamples.zip\Extend\Constraints\Python\RangeExample.py
- <Install Dir>\CodeSamples\STKCodeSamples.zip\Extend\VGT.Plugins\Python\CalcScalar\CalcScalar_Plugin_Example.py
In version 12 of the STK software, the files are located in <Install Dir>\CodeSamples\CodeSamples.zip.
Before beginning the lesson, you will view the .py files using your preferred method. It is beneficial to know where the files are located and how they are formatted so you can develop your own plugins. These examples are simple in nature, but you can use the files as reference or duplicate and modify for your own mission analysis. The intent of the files is to show you the functionality of the plugin points.
Unzipping STKCodeSamples.zip
Before viewing the Python files, you need to unzip the STKCodeSamples folder.
- Navigate to <Install Dir>\CodeSamples (e.g., C:\Program Files\AGI\STK_ODTK 13\CodeSamples).
- Select STKCodeSamples.zip.
- Extract the contents of STKCodeSamples.zip.
If you are unable to extract the contents of STKCodeSamples.zip, create a folder on your Desktop and copy the two files there.
Viewing RangeExample.py
Explore the RangeExample.py file.
- Navigate to the location of RangeExample.py.
- Open the file using your preferred method (e.g. Python, Jupyter Notebooks, Notepad++).
- Review the file.
- At the top, note the modules that are loaded in. You will need to have the Python API installed in order to import the modules.
- Scroll through and identify the target object: Satellite, Aircraft, Facility, and Ground Vehicle. These are the default objects, but the file can be modified to use for other objects in the scenario.
- The script will evaluate an access between two objects with a user defined minimum and maximum range value (either or both can be set).
- Close the file.
Viewing CalcScalar_Plugin_Example.py
Explore the CalcScalar_Plugin_Example.py file.
- Navigate to the location of CalcScalar_Plugin_Example.py.
- Open the file using your preferred method (e.g. Python, Jupyter Notebook, Notepad++).
- Review the file.
- At the top, note the modules that are loaded in. You will need to have the Python API installed in order to import the modules.
- Scroll down and note the plugin configuration properties line.
- Continue to scroll down and note the variables (e.g. MyDouble, MyString). These are properties the user can modify and load into their scenarios.
- Scroll down and note the simple calculation called Evaluate. It is an addition of the object's Cartesian X and Cartesian Z components. While not a particularly meaningful result, the intention is to highlight that calculations can be set in one place (the plugin script) and then can be used in the scenario
- Close the file.
Adding the PATH environment variable
The STK application must link directly to the Python libraries. The Python directory containing Python3.dll must be added to the PATH environment variable. If you are using Linux, the location of libPython3.so must be included in LD_LIBRARY_PATH. If using Windows, users can set the Environment Variables in the System properties.
Set up your PATH environment variable now based on your operating system.
The STK application locates Python modules (including the STK Python API) following the rule that the Python interpreter uses. The STK software searches for the modules in the following order:
- PYTHONPATH environment variable
- A Python Virtual environment implemented using the venv module (virtual environments other than venv are not supported)
- PYTHONHOME environment variable
- PATH (or LD_LIBRARY_PATH on Linux) environment variable, searching for the first Python 3 installation
Upon instantiating a Python plugin, the STK application displays a message specifying the Python module search paths that are used in the Message Viewer. You will see that later in this lesson.
Creating a new scenario
Create a new scenario with a run time of 1 day:
- Launch the STK application (
 ).
). - Click Create a Scenario (
 ) in the Welcome to STK window.
 - Enter the following in the STK: New Scenario Wizard:
- Click when you finish.
- Click Save (
 ) when the scenario loads. A folder with the same name as your scenario is created for you in the location specified above.
 - Verify the scenario name and location.
- Click .
| Option | Value |
|---|---|
| Name | Exploring_Plugin_Points |
| Start | Default |
| Stop | Default |
Save Often!
Examining Message Viewer
Before continuing the mission development, confirm that the STK application can find the Python path. This will be shown in the message viewer.
- Extend the View menu.
- Select Message Viewer.
- Confirm that the STK application has found the Python installation. It will state "Found Python installation at C:\<file path>".
- Close (
 ) the Message Viewer.
Loading in the constraint plugin
The first plugin point you will use is the RangeExample.py constraint plugin. Load the plugin into the STK application.
- Extend the Edit menu.
- Select Preferences.
- Select the Python Plugins page.
- Click .
- Navigate to the RangeExample.py file from the install directory.
- Click .
- Click .
Reopening the scenario
Application level plugins must be configured before creating or loading the scenario. Now that the plugin is loaded into the scenario, you need to save the scenario, close it, and reopen it
- Save () the scenario.
- Close () the STK application.
- Launch the STK application ().
- Click Open a Scenario (
 ) in the Welcome to STK window.
 - Navigate to your saved scenario file.
- Click .
You can now use the RangeExample.py plugin.
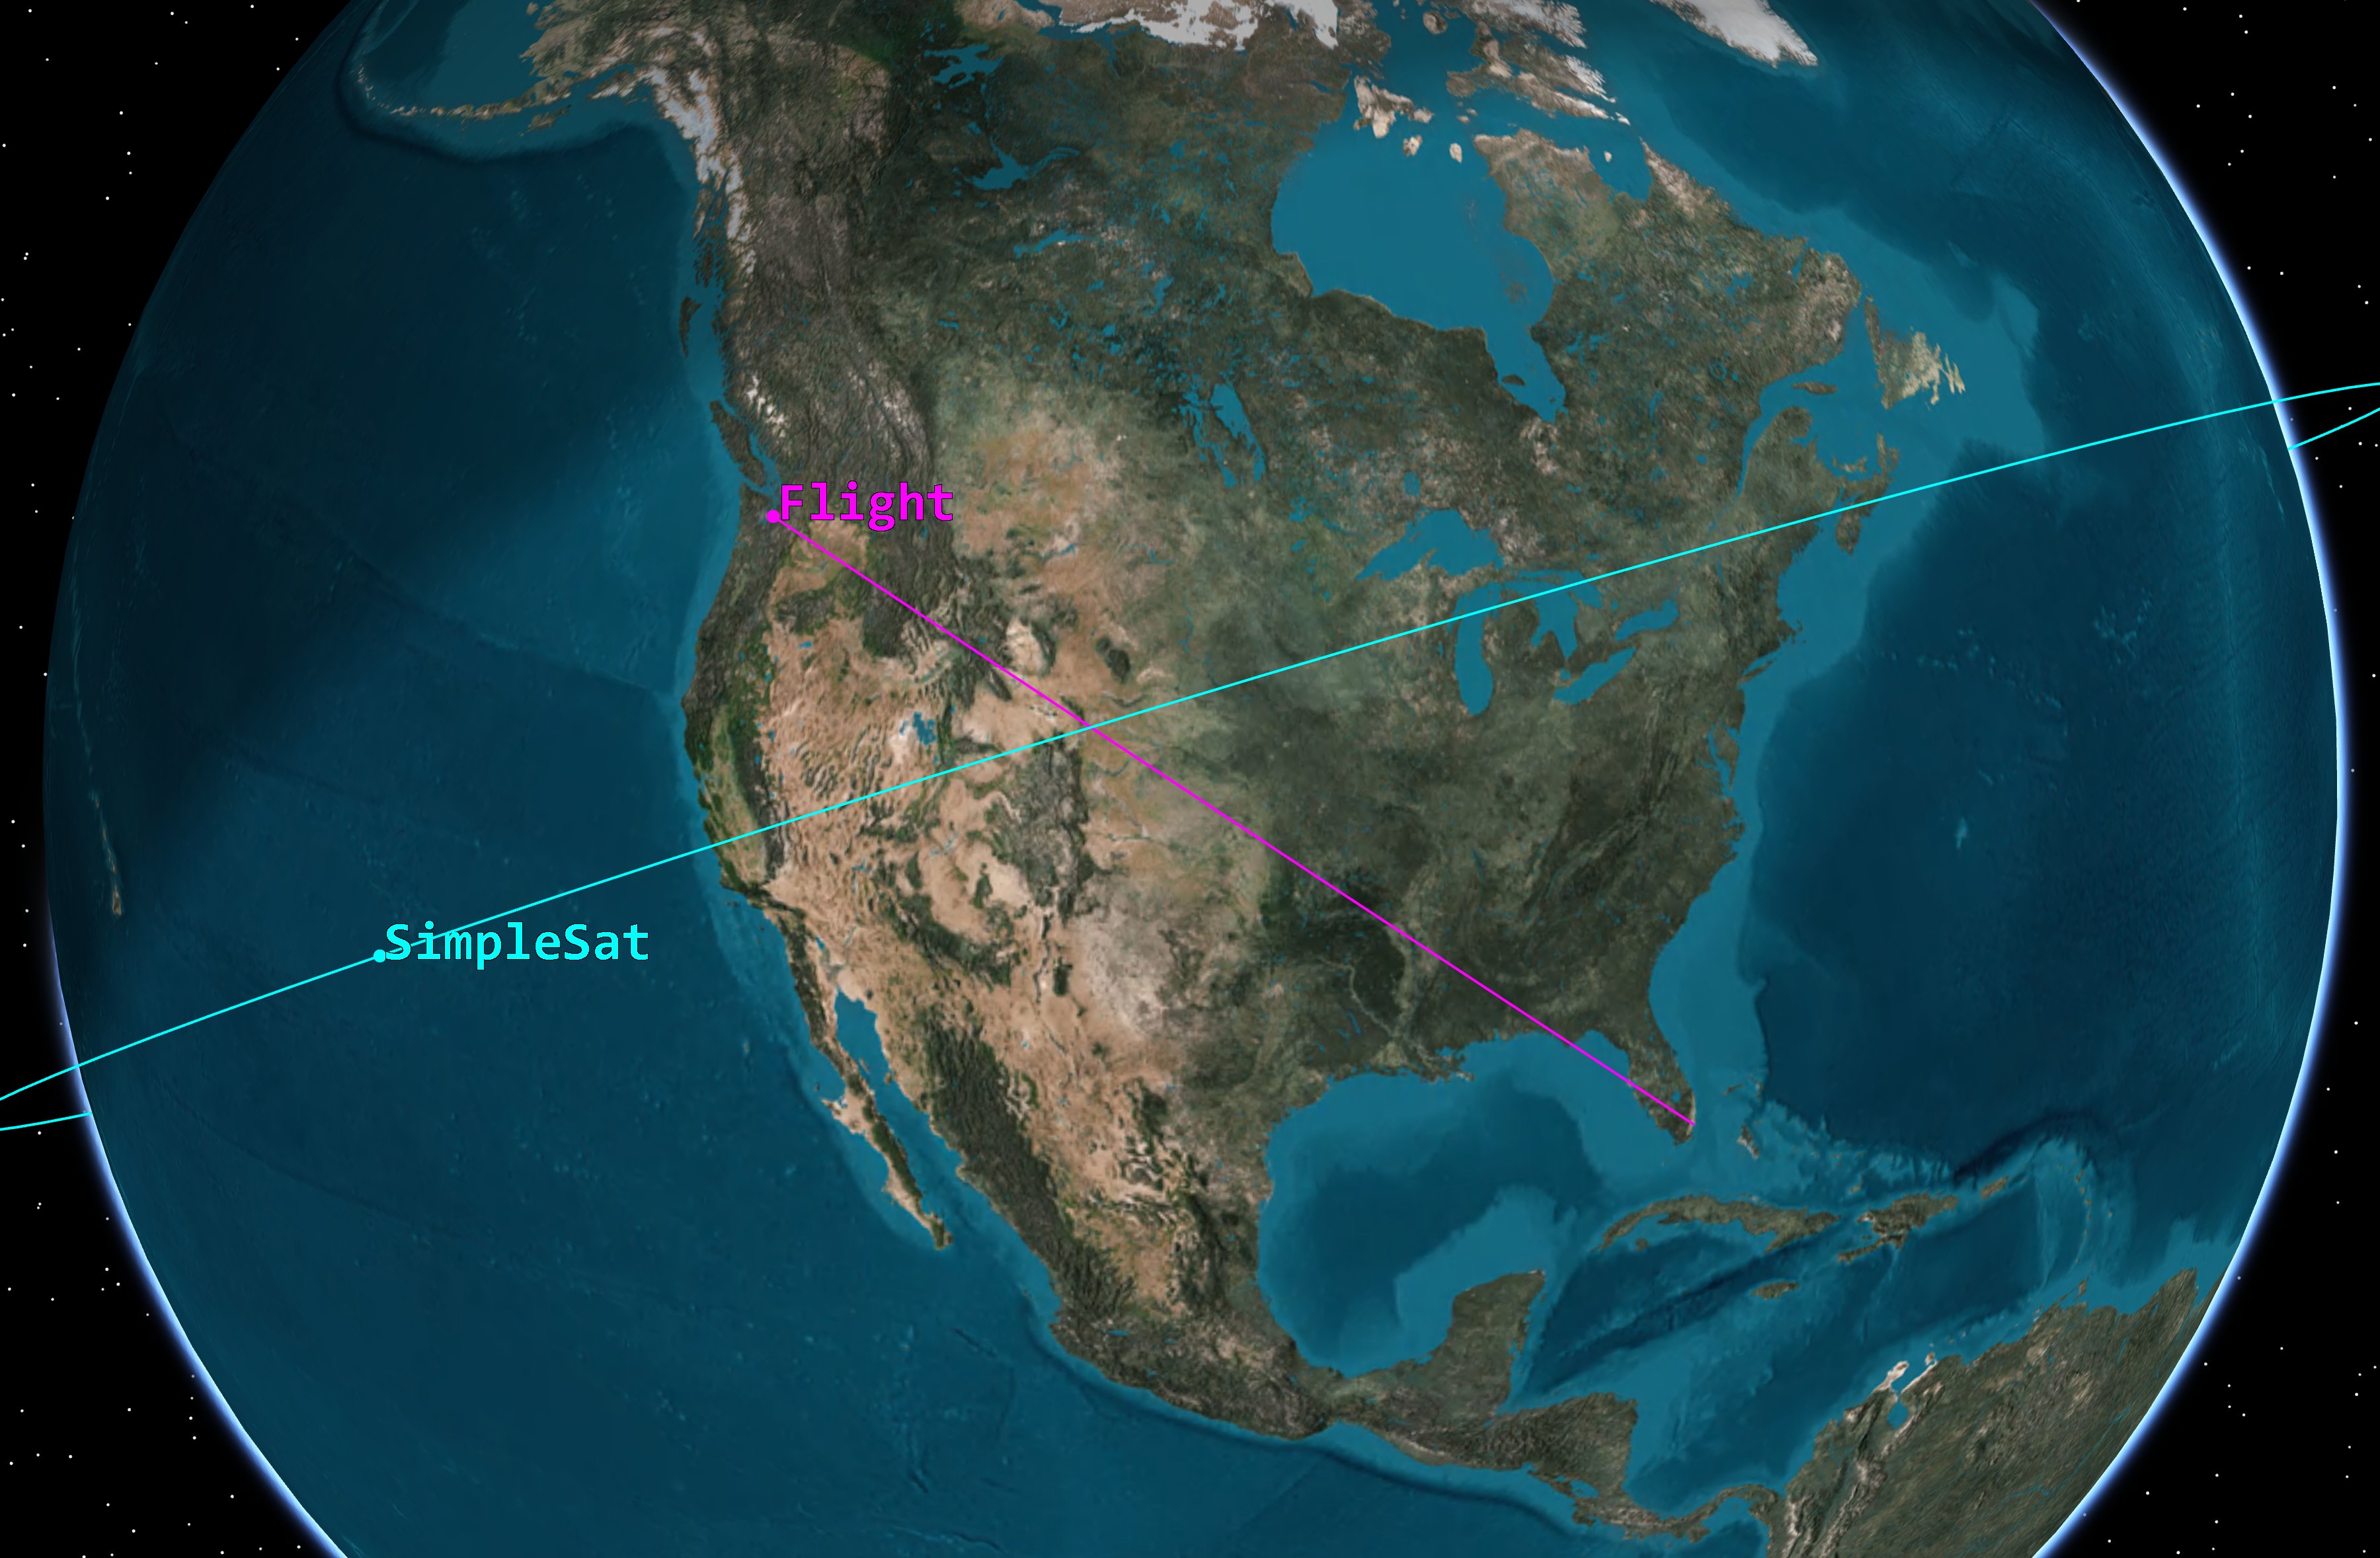
Modeling an aircraft
You'll model a simple mission. Begin with an aircraft object flying from one side of the continental US to the other. The steps below insert exact values for the aircraft's (![]() ) route. The exact values are not necessary. You can alternatively use 2D or 3D Object Editing to define the aircraft's (
) route. The exact values are not necessary. You can alternatively use 2D or 3D Object Editing to define the aircraft's (![]() ) route. Simply place one point on the west coast of the US and the second point on the east coast.
) route. Simply place one point on the west coast of the US and the second point on the east coast.
- Select Aircraft (
 ) in the Insert STK Objects tool.
 - Select the Define Properties (
 ) method.
 - Click .
- Click twice on the Basic - Route page.
- Enter the following. Press the Enter key on the keyboard after each entry:
- Click .
- Rename Aircraft1 () Flight.
| Option | Value |
|---|---|
| Waypoint 1 - Latitude | 47.4493 deg |
| Waypoint 1 - Longitude | -122.308 deg |
| Waypoint 2 - Latitude | 25.796 deg |
| Waypoint 2 - Longitude | -80.2869 deg |
Modeling a satellite
Now you will model a satellite which you will compute Access with the aircarft.
- Select Satellite (
 ) in the Insert STK Objects tool.
 - Select the Orbit Wizard (
 ) method.
 - Select Show All Objects in the Graphics section of the Orbit Wizard.
- Set the following in the Orbit Wizard:
- Click .
| Option | Value |
|---|---|
| Type | Orbit Designer |
| Satellite Name | SimpleSat |
| Semi-major Axis | 7000 km |
| Eccentricity | 0 |
| Inclination | 45 deg |
| Argument of Perigee | 0 deg |
| RAAN | Adjust the RAAN value, so the satellite will be overhead of the aircraft's route at the beginning of the scenario. This will ensure Access between the satellite and aircraft. |
| True Anomaly | 45 deg |
Access
Now that the aircraft and satellite are in the scenario, you will compute access between the two objects. The plugin you loaded in (but haven't set yet) will be an access constraint. Let's first understand the access interval before you add the access constraint into the calculation.
Computing Access
Compute access between the satellite and aircraft.
- Right-click on SimpleSat (
 ) in the Object Browser.
 - Select Access (
 ).
). - Set the Access for object to SimpleSat
- Select Flight () from the Associated Objects list.
- Click .
Generating an Access report
Generate Access report to confirm you have at least one access interval.
- Click . in the Reports section of the Access Tool.
- Confirm that you have at least one access interval.
- If you do not have at least one access, you will adjust the satellite’s RAAN in the next section.
- Close () the Access report.
Adjusting the satellite's RAAN
If you have at least one access, skip to the next section. If you don't, follow the steps below to adjust the satellite's RAAN.
- Right-click on SimpleSat () in the Object Browser.
- Select Satellite.
- Select Orbit Wizard...
- Adjust the RAAN value, so the satellite will be overhead of the aircraft's route at the beginning of the scenario.
- Click .
- Look at the Timeline View at the bottom of STK application GUI.
- Determine if you have at least one access interval.
- Click when access is achieved.
Continue to adjust the RAAN until you have at least one access interval.
Generating an AER report
Generate an AER report. AER stands for Azimuth, Elevation, and Range.
- Return to the Access Tool.
- Click . in the Reports section.
- Review the Range column. With the current setup, the range values are between 650 km - 2800 km.
- Leave the report open.
Using the constraint plugin
You now know what the access is without range constraints. Let's now use the constraint plugin to set a minimum and maximum limit for the range.
Adding constraint plugin
Add the constraint plugin to the aircraft's properties.
- Open Flight's () properties ().
- Select the Constraints - Active page.
- Click Add new constraints (
 ) in the Active Constraints toolbar.
 - Select PythonRangeExample in the Constraint Name list when the Select Constraints to Add dialog box opens.
- Click .
- Click to close the Select Constraints to Add dialog box.
- PythonRangeExample is listed under Constraint Name since you loaded the plugin earlier in the lesson.
Setting range constraints
Set the min and max range constraint.
- Select the Min check box.
- Select the Max check box.
- Enter the following values, starting with the maximum:
- Click .
| Option | Value |
|---|---|
| Max | 1000000 m |
| Min | 700000 m |
Note that you are setting the maximum value first to keep the values within a valid range. You also need to include the units (m).
Examining the range constraint
With range constraints set, reexamine the AER report.
- Refresh (
 ) the AER report.
 - Notice the duration of the access intervals has been shortened and the range values are now between 700 km - 1000 km
Using this plugin, users can define a custom range constraint for their access intervals.
Removing the range constraint
Remove the range constraint from the aircraft.
- Return to Flight's () Contraints - Plugin properties () page.
- Clear Min.
- Clear Max.
- Click to accept the changes and close the Proerties Browser.
Examing the CalcScalar plugin
The second plugin point you will examine is in Analysis Workbench Tools. Scenario level plugins are configured for each plugin point that is created within a scenario. You'll use the sample CalcScalar_Plugin_Example.py in this section.
Opening Analysis Workbench
Navigate to the Analysis Workbench's Calculation Tool.
- Extend the Analysis menu.
- Select Analysis Workbench (
 ).
). - Select the Calculation tab.
Creating a Scalar Calculation
Start by creating a new Scalar Calculation (![]() ) for the satellite with set the Type to Plugin.
) for the satellite with set the Type to Plugin.
- Select SimpleSat () in the Object list.
- Click Create new Scalar Calculation (
 ).
). - Click next to the Type field.
- Select Plugin in the Select Component Type list.
- Click .
- Enter CalcScalarExample in the Name: field.
Setting the plugin
Set the new scalar calculation to be the sample CalcScalar_Plugin_Example.py file.
- Select Python in the Select Plugin Name list.
- Click .
- Click click to edit in the Filename Value field.
- Navigate to the CalcScalar_Plugin_Example.py file in the install directory.
- Click .
- Click to close the CalcScalar Plugin Settings window.
- Click to close the Edit Component Properties window.
You should now see the Properties filled in with the MyDouble & MyString variables. If there is a configuration, as in this case, you will see it under Properties. This example is simple and users can reference it when developing their own plugins.
Examining the plugin
This plugin also had a simple calculation: adding the Cartesian X and Cartesian Z components. Let's take a look at the result.
- Return to the Analysis Workbench () window.
- Right-click on CalcScalarExample () in the Components for: SimpleSat list.
- Select Report/Graph...
- Hold the Ctrl key down on the keyboard.
- Select CalcScalarExample & CalcScalarExample Rate in the Select Report Elements list.
- Click .
- Review the results.
While not a significant result, the intention is to show how Python plugins can be loaded in and used in analysis and reports.
Saving your work
- Close any open reports, properties and tools which are still open.
- Save () your work.
Summary
This scenario walked you through using the new Python plugin points. You began by exploring the files from the install directory. Then you built the scenario, loaded in the plugin files, and demonstrated ways they can be used for analysis.
On your own
There are many ways to use plugins with the STK application and you've explored a few examples. On your own, modify the existing plugins or create your own and further develop your mission.