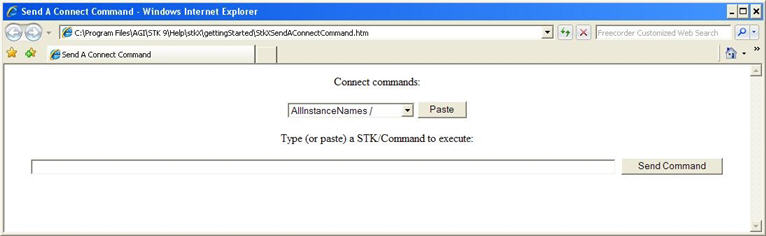
The following example will take (a simplified version of) the SendAConnectCommand HTML utility that will run inside STK, and convert it to a single integrated utility containing a Globe control.
The above image shows what you should see if you open SendAConnectCommand.html with the HTML Viewer inside STK. The version used for this example can be found in:
<STK install folder>Help\stkX\gettingStarted
The complete source code for this example is given below. The new tool built in this exercise will allow you to send Connect commands to STK X through the COM layer.
Open up StkXSendAConnectCommand.htm in a text editor (Notepad or
TextPad, for example). Start by adding the STK X Application and
Globe control into the page. Navigate down to the bottom of the
code, and start editing before the </body>
line.
<Table border="1" Align="center">
<tr><td colspan = "2">
<object name="STKXApp" classid="CLSID: F508ED88-0F6A-433F-BB83-35DB379BCB4C " width="0" height="0"></object>
<object name="AxVO" classid="CLSID: 0035ED34-09AB-478D-BF38-887A9830A45A " width="600" height="400" Border="1"></object>
Be sure to note that the name of the Globe control object in the code is AxVO, as this is how the remainder of the code will identify this new object.
Before any commands can be sent to STK X via Connect Commands
the VBScript portion of the code needs to be modified to account
for this change in destination. We start by modifying
InitPage.
The original version must locate STK by catching the external window and then identifying its personality. This portion of the code becomes much simpler when using STK X. Clear the existing contents of InitPage, except for the “Set stk” line. Having given our instance of STK X a name in the previous section, this line should now look like this:
Set stk = STKXApp
Now that stk has been properly set, the next portion of the
script can be modified. Move down the code until you find
SendCommand. As in the case of the last subroutine,
start by removing some of the unnecessary code. In this case,
remove everything between “on error resume next” and
“Set rVal.” The section that is being removed
contains window management information that will no longer be
necessary.
Next add the word command in the header for the
subroutine. It should look like this:
Sub SendCommand(command)
This will allow the subroutine to catch the Connect Command. You
will also need to change the Set rVal line to the
following:
Set rVal = stk.ExecuteCommand(command)
This change also requires a change in the HTML section. On the
line where the text box called Input is set, change
the empty set of parenthesis to contain Input.value. The line, when
edited, should look like this:
<center><input type="text" name="Input" size = 135> <input type="button" size="20" align="Center" value="Send Command" onClick="SendCommand(Input.value)" class="submit">
To finish the modification of SendCommand, all that
is necessary is to remove the “thiswindow.NoWBClose =
false” line.
In this section we will build the animation tool bar that a user expects to see associated with the typical STK interface. This will be constructed inside the table that contains the Globe control. Add a new row and table data entry with a column span of 2, aligned to center.
<tr><td colspan = "2" align="center">
First add the reset button. Use the following line:
<input type="image" name="AnimateReset" src="images\reset.gif" alt="AnimateReset" value="AnimateReset" onClick="SendCommand('Animate * Reset')"></input>
Note that the onClick directive is to send the
AnimateReset Connect command via InputCommand. Also,
be sure to check that the images folder containing the reset.gif
file (as well as the other gif images) is in the images sub-folder
of the gettingStarted folder. Add a similar line for each of the
animation buttons using the information from the table below.
| Name/alt/value | Image name | Connect command |
|---|---|---|
| AnimateReset | reset.gif | Animate * Reset |
| StepReverse | stepbak.gif | Animate * Step Reverse |
| AnimateReverse | playbak.gif | Animate * Start Reverse |
| AnimatePause | pause.gif | Animate * Pause |
| AnimateForward | play.gif | Animate * Start Forward |
| AnimateStepForward | step.gif | Animate * Step Forward |
| AnimateFaster | speedup.gif | Animate * TimeStep Increase |
| AnimateSlower | slowdown.gif | Animate * TimeStep Decrease |
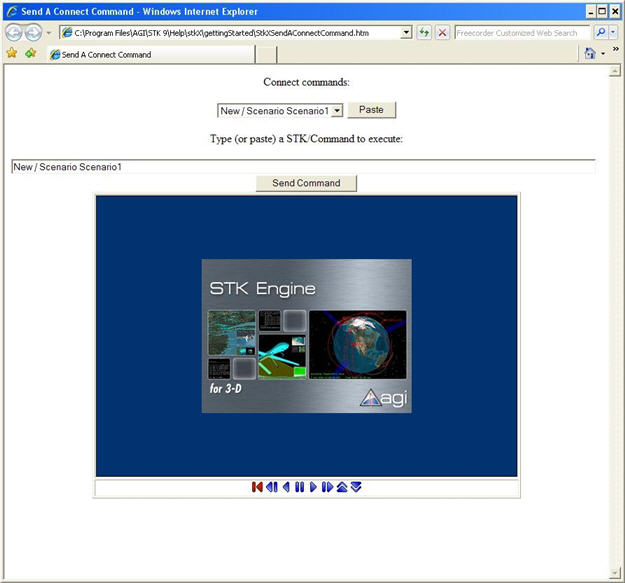
Save your page once again, and open it in Internet Explorer. If everything has been done properly your page should look like the image below. Paste the New Scenario command from the pull down menu and click Send Command to insure that everything is working properly.
<html>
<script language="VBSCRIPT">
<!--
Dim stk
Sub InitPage()
Set stk = STKXApp
End Sub
Sub SendCommand(command)
on error resume next
Set rVal = stk.ExecuteCommand(command)
if err <> 0 then
SendCommand = 0
MsgBox("NACK")
else
SendCommand = rVal(0)
end if
End Sub
Sub Paste
Input.value = Selection(Selection.selectedIndex).text
End Sub
Sub UnloadPage()
Set stk = Nothing
End Sub
// -->
</script>
<Body onLoad="InitPage()" onUnload="UnLoadPage()">
<object name="STKXApp" classid="CLSID:F508ED88-0F6A-433F-BB83-35DB379BCB4C" width="0" height="0"></object>
<center>
<td align="center">
Connect commands:<br><br>
<select name="Selection">
<option>AllInstanceNames /</option>
<option>CheckScenario /</option>
<option>GetDefaultDir /</option>
<option>GetLicenses /</option>
<option>GetSTKHomeDir /</option>
<option>GetSTKVersion /</option>
<option>GetDB /</option>
<option>GetUserDir /</option>
<option>New / Scenario Scenario1</option>
</select>
<input type="button" value=" Paste " onClick="Paste()" class="submit">
<br><br>
Type (or paste) a command to execute:<br><br>
<center><input type="text" name="Input" size = 135> <input type="button" size="20" align="Center" value="Send Command" onClick="SendCommand(Input.value)" class="submit">
<br>
<Table border="1" Align="center">
<tr><td colspan = "2">
<object name="AxVO" classid="CLSID:4D7DCF2C-3CF7-4C28-ABC2-E507E477E292" width="600" height="400" Border="1"></object>
<tr><td colspan="2" align="center">
<input type="image" name="AnimateReset" src="images\reset.gif" alt="AnimateReset" value="AnimateReset" onClick="SendCommand('Animate * Reset')"></input>
<input type="image" name="StepReverse" src="images\stepbak.gif" alt="StepReverse" value="StepReverse" onClick="SendCommand('Animate * Step Reverse')"></input>
<input type="image" name="AnimateReverse" src="images\playbak.gif" alt="AnimateReverse" value="AnimateReverse" onClick="SendCommand('Animate * Start Reverse')"></input>
<input type="image" name="AnimatePause" src="images\pause.gif" alt="AnimatePause" value="AnimatePause" onClick="SendCommand('Animate * Pause')"></input>
<input type="image" name="AnimateForward" src="images\play.gif" alt="AnimateForward" value="AnimateForward" onClick="SendCommand('Animate * Start Forward')"></input>
<input type="image" name="AnimateStepForward" src="images\step.gif" alt="AnimateStepForward" value="AnimateStepForward" onClick="SendCommand('Animate * Step Forward')"></input>
<input type="image" name="AnimateFaster" src="images\speedup.gif" alt="AnimateFaster" value="AnimateFaster" onClick="SendCommand('Animate * TimeStep Increase')"></input>
<input type="image" name="AnimateSlower" src="images\slowdown.gif" alt="AnimateSlower" value="AnimateSlower" onClick="SendCommand('Animate * TimeStep Decrease')"></input>
</Table>
</body> </html>
STK Programming Interface 11.0.1