Visual Studio UI Plugin Template
This template enables developers to build an STK UI Plugin
quickly by setting up a properly configured, blank plugin. The
template includes several useful code sample and libraries:
- Examples for adding a progress bar, a link to the plugin from
the context menu, a link to the plugin from the main menu, and a
link to the plugin from the toolbar.
- An example of a persistent preference page. The Persistent
preference page keeps user selections even after STK is
closed.
- The STK code library, which is used for interacting with STK
and manipulating STK objects. It includes simple methods to
subscribe to events in STK, and get a list of objects in an STK
scenario.
- Globe mouse events code that are commented out.
To use the template to build a UI Plugin, follow the
instructions below.
Copy the Templates
Copy the following zip files to your Visual Studio user folder
(<user area>Visual Studio<version
number>Templates\ProjectTemplates\Visual C#):
Template used for creating UI plugin
<stk install
folder>/CodeSamples/CodeSamples/Extend/Ui.Plugins/Visual Studio
Templates/STK11.UiPlugin.Template.zip
Template used for copying binaries and creating XML
file
<stk install
folder>/Codesamples/Codesamples/Extend/Ui.Plugins/Visual Studio
Templates/STK11.UiPlugin.Copier.zip
Note: Do not unzip these
files.
Create a New Visual Studio Project
Launch Visual Studio and follow these instructions, as indicated
in the image below:
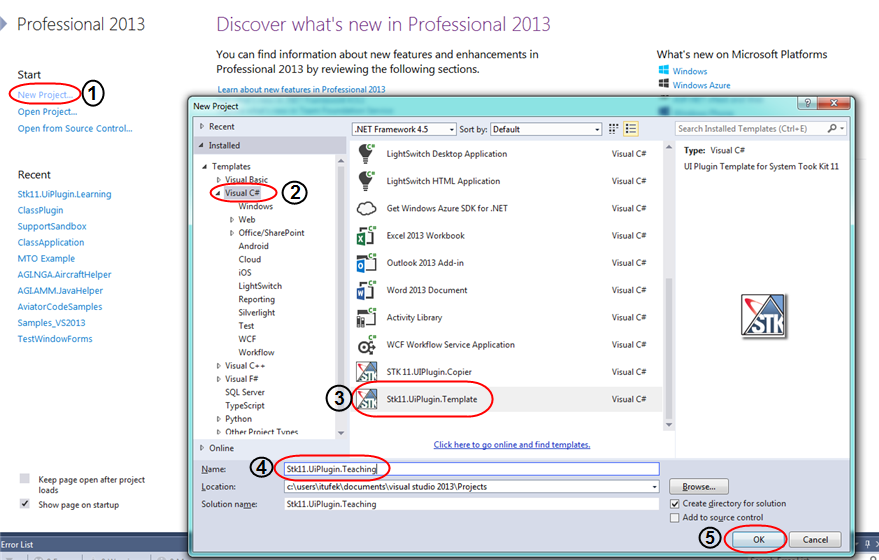
- Create a New Project.
- In the left pane, select Visual C# under templates.
- In the right pane, select STK11.UIPlugin.Template.
- Enter a unique name for your project. If the name is not
unique, your plugin will be in conflict with other UI plugins that
have the same name.
- Click OK.
Build and Deploy your Project
- Open Setup.cs in the Visual Studio editor.
-
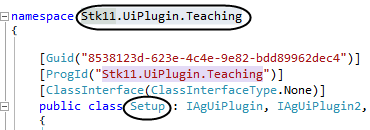
- Highlight and copy your namespace. Also take note of the name
of your public class. In the example above, Stk11.UiPlugin.Teaching
is the name space and Setup is the public class.
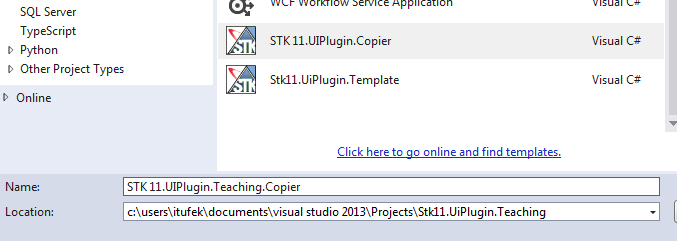
- Right click on your solution and add a new project.
- Select STK11.UiPlugin.Copier and give a unique name to the
project.
-
- Right-click the project name in the Solution Explorer and
select Set as StartUp Project.
- Build and run the solution in Debug mode. You will be presented
with following dialog box:
-
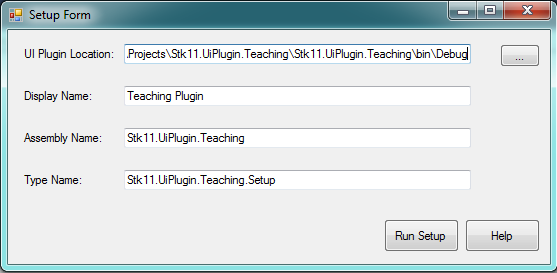
- Use the browse “…” button to select the output folder for your
plugin. Enter the following:
Display Name. The external name of your plugin.
Assembly Name. The namespace for your plugin. (If you forgot it,
see Build your Project above.)
Type Name. The entry point for the plugin. In this example, it
is the full path to the Setup class (namespace + “.Setup”).
- Click Run Setup, click Done,
and then close the Setup window.
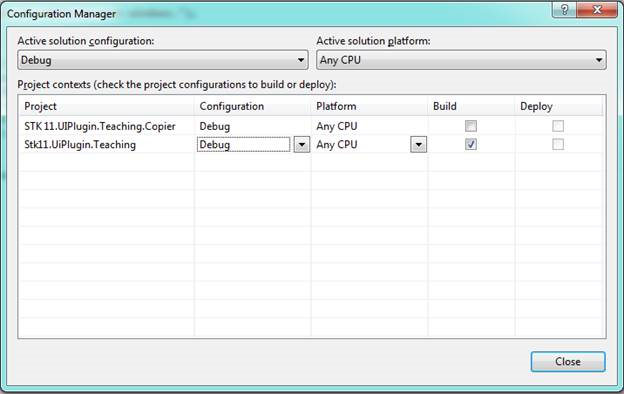
- From the Build menu, select Configuration Manager and switch
the configuration from Debug to Release.
-
- Build the copier project.
- Open the windows explorer and navigate to the release folder of
the copier project
-
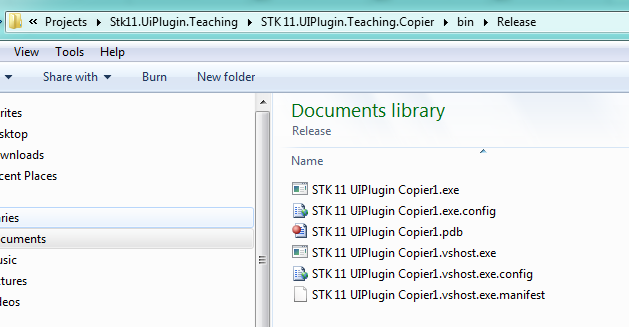
- You can either copy the first two files (exe and config) and
give them to your costumers, or run the exe yourself to install the
plugin on your computer. If you run the exe, you will get following
dialog:
-
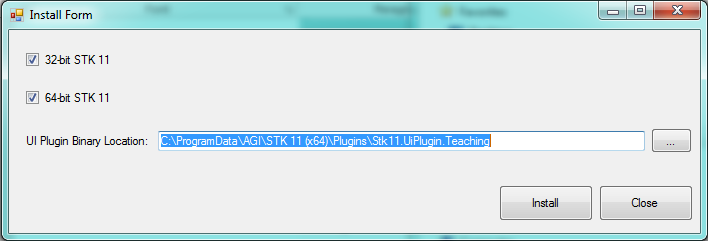
- Click Install, click the OK button, and Close the dialog when
finished.
-
The plugin is now installed on your computer.
Debugging your Plugin
The plugin is now available in STK, but most of its features are
commented out. If you want to debug the plugin, you need to point
your manifest file (which was created by the copier) to your debug
binary folder. Here are instructions on setting up the plugin for
debugging:
- In Windows Explorer, navigate to the debug folder for the
plugin and copy path.
-

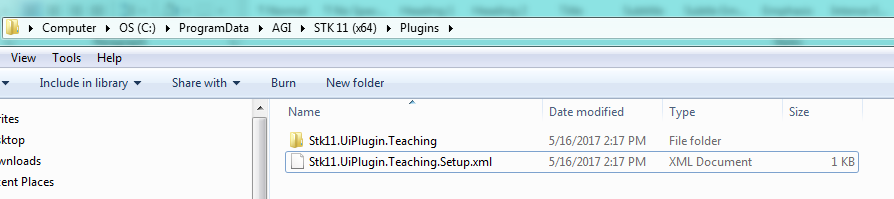
- Navigate to your manifest file (C:\ProgramData\AGI\STK 11
(x64)\Plugins).
-
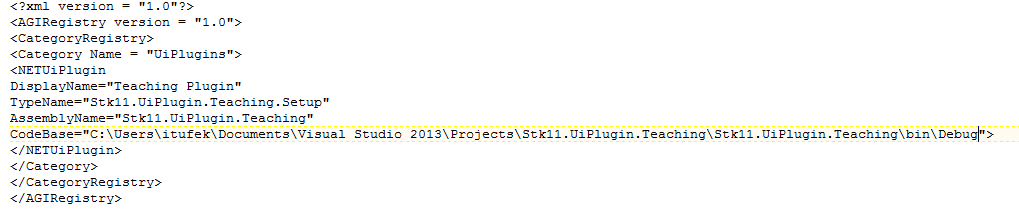
- Open the xml file in the text editor of your choice and change
the code path to your debug folder:
-
- Back in Visual Studio, switch the startup project back to the
plugin and make sure that the configuration is set to Debug.
- Open the plugin project properties and select the Debug tab.
Change Start Action to Start External Program, and
select AgUiApplication.exe in the STK installed bin folder.
Related Topics:
STK 11.2.1 Programming Interface