Terrain Server
STK Terrain makes it easy to import your own terrain data for visualization in Cesium. This walk-through shows you how to obtain raw terrain data, import it into STK Terrain Server, and visualize the resulting tileset in Cesium.
For additional information on installing and configuring the Terrain Server, see the STK Terrain Server Installation Guide.
For importing a Tileset created by another server, see the STK Terrain Server Processed Data Installation Guide.
For documentation on the Public REST API, see the STK Terrain Server Public REST API Guide.
STK Terrain Server can import raw terrain data in any raster format supported by the Geospatial Data Abstraction Library (GDAL), and in most map projections. Let’s start by obtaining GTOPO30, a global, 30 arc-second (approximately 1 kilometer) dataset for the entire world, available from the United States Geological Survey (USGS). This dataset is found in the USGS Long Term Archive:
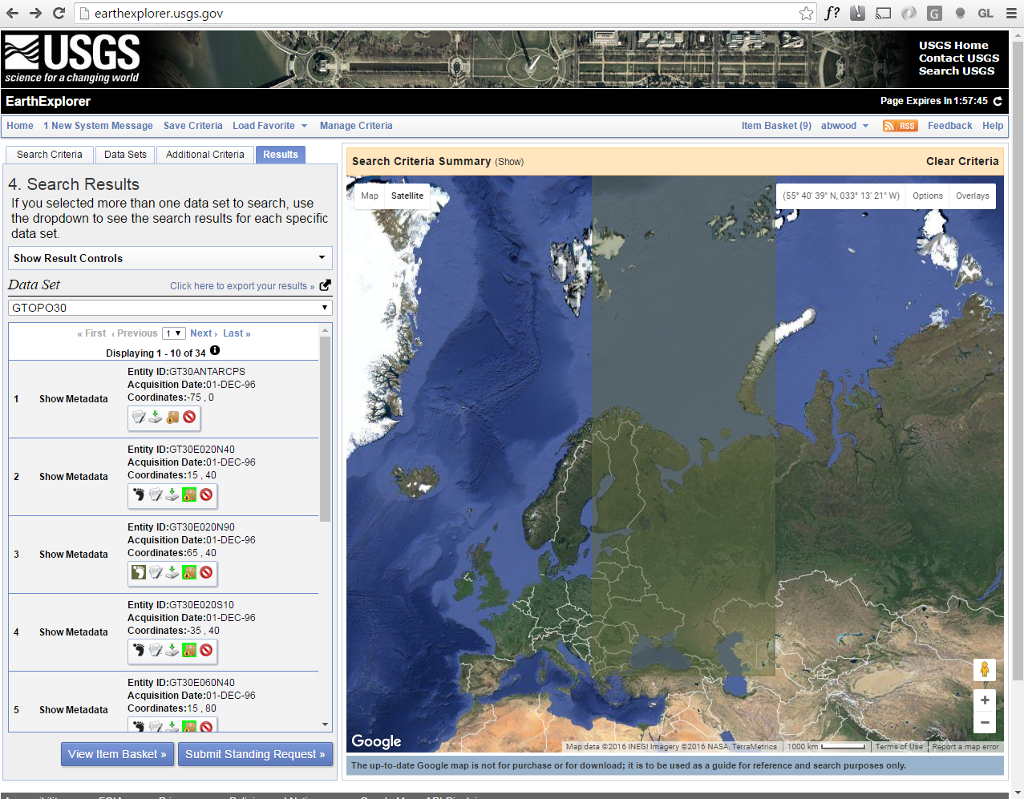
The USGS Long Term Archive states that the dataset can be downloaded from the EarthExplorer Data set Browser. Simply select the Data Sets tab, expand the Digital Elevation tree control, and select the GTOPO30 data set. Click on the Results link to find download links for the data set.
GTOPO30 is split into 33 tiles. To build a tileset with terrain for the entire globe, download all of the files, excluding GT30ANTARCPS Entity ID, because it is redundant with the other files. To save time if you don’t need the entire globe, you can download just the tiles you need.
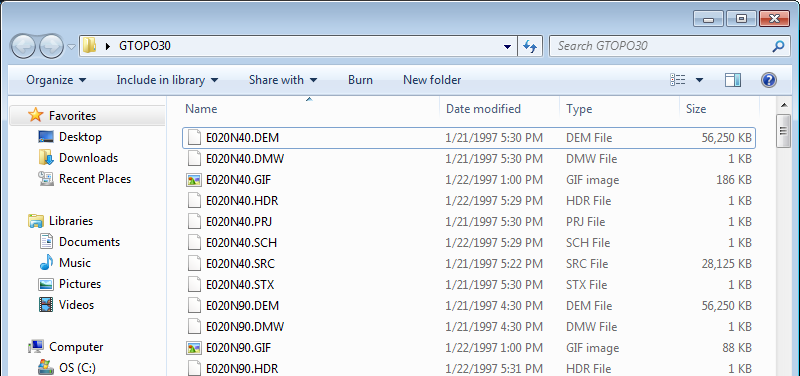
Once the GTOPO30 tiles are downloaded, extract them to a folder somewhere on your system. You can use 7-Zip to extract *.zip files on Windows. You should have a folder that looks something like this:
Now that we’ve obtained a raw terrain dataset, let’s import it into STK Terrain Server. Navigate to the Data Sources page:
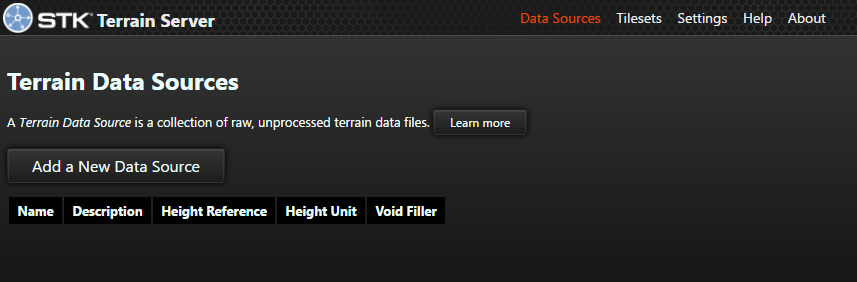
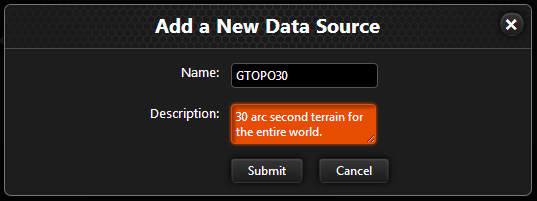
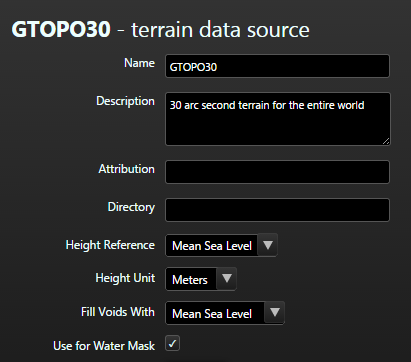
An STK Terrain Server data source is a raw set of terrain data, like the GTOPO30 data we just downloaded. Let’s create a new data source for our GTOPO30 data by clicking the Add a New Data Source button. We’ll name it “GTOPO30” and enter a brief description of the data source before clicking the Submit button.
The GTOPO30_README.doc at the USGS site – particularly section 2.0 - gives us all of the information we need to configure the data source. It says:
The vertical units represent elevation in meters above mean sea level.
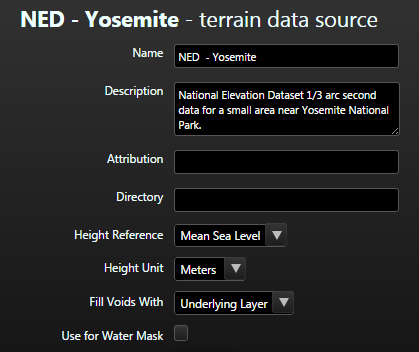
That tells us that the Height Reference field should be set to Mean Sea Level and that the Height Unit field should be set to Meters. Next, it says:
In the DEM, ocean areas have been masked as "no data" and have been assigned a value of -9999.
This tells us that we want to set the Fill Voids With field to Mean Sea Level. A void, or “no data” sample, indicates that a height is not available at a particular location. In some data sources, this simply means that the height is not known at that location, perhaps due to limitations of the sensor used to measure the heights. In those cases, it is reasonable to fill the void with heights from the underlying layer in the tileset, if any. For other data sources, including GTOPO30, a void is used to indicate that there is no land at the location, and thus we would prefer to fill the void by sampling mean sea level at that location.
This correlation of void values to ocean areas also tells us that this global datasource can be used for constructing a watermask. The watermask is a feature that informs client applications where water effects should be rendered on the globe. If constructing a watermask for a tileset, we recommend that a global datasource, such as GTOPO30, be incorporated into the tileset first to establish a global watermask. Additional datasources can then be incorporated into the tileset to define higher resolution watermask datasources.
After making these changes, click Save at the bottom of the page. Our configured data source looks like this:
Next, we’ll add the files that we previously downloaded to this data source. There are two ways to do this. If the files are accessible to the server, and in particular if they are accessible to the Windows user running the IIS app pool on the server, we can simply point the server to the directory in which the files are stored by setting the Directory field above and clicking Save.
More likely, however, we’d like to upload the files to the server. To do that, open the folder containing your GTOPO30 files in Windows Explorer, select all of the files, and drag them onto the Upload Files area of the data source page in your web browser. The upload will take a few minutes, depending on the speed of your network connection to the server.
When the upload completes, you should see all of the files you uploaded in the Available Files list on the left:
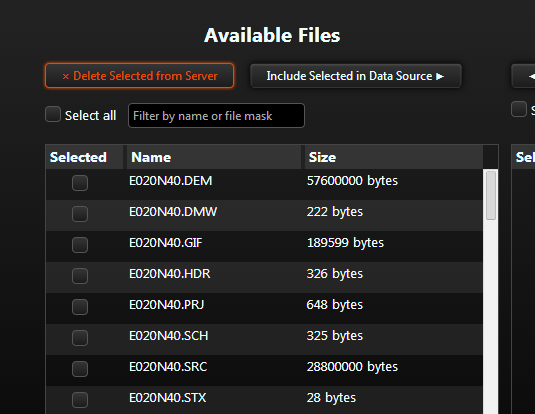
Next, we need to tell STK Terrain Server which of these files contain the actual terrain data. In the case of GTOPO30, we can again check the GTOPO30_README.doc file to learn that the *.DEM files contain the terrain data. Typically, as is the case here, the terrain data files are the largest files.
We can quickly select all of the *.DEM Files by typing *.DEM in the Filter by name or file mask box and then clicking Select all. Then, we click the Include Selected in Data Source button, and the files will move over to the Included Elevation Files list on the right. Click Save. STK Terrain Server will inspect each of the select files to learn its type or format. When the save completes, you should see a list like this:
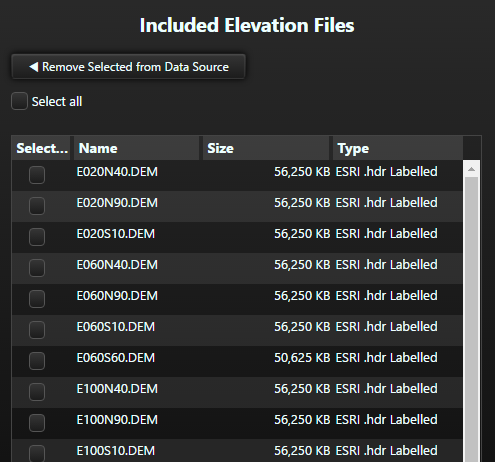
The server has deduced that the GTOPO30 DEM files are "ESRI .hdr Labelled" files.
At this point, we have added a GTOPO30 data source to the server, but we can’t use a data source directly in Cesium. We need to process this raw data into a tileset that is optimized for rendering.
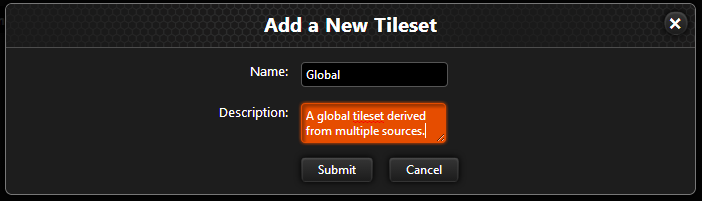
To create a tileset, visit the Tilesets page, and click the Add a New Tileset button:
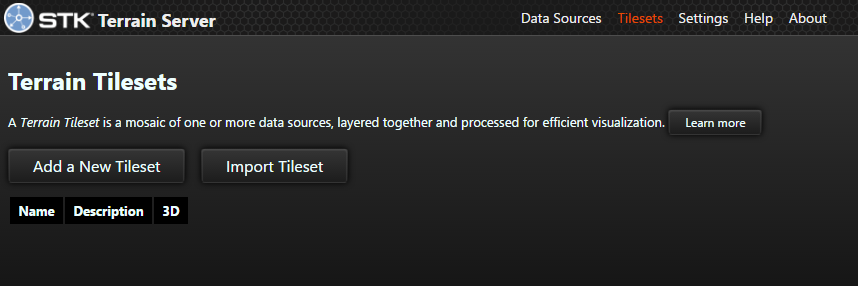
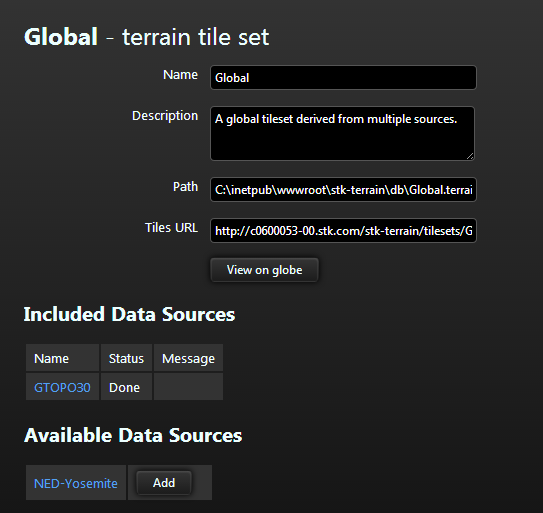
We’ll call our new tileset “Global” and give it a reasonable description:
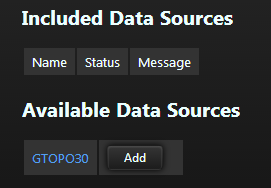
Now we add our GTOPO30 data source to the tileset by clicking the Add button next to GTOPO30, and clicking Save.
STK Terrain Server will begin processing the datasource and incorporating it into the tileset. The entire process will take between a couple of minutes and a couple of hours, depending on the speed of the server.

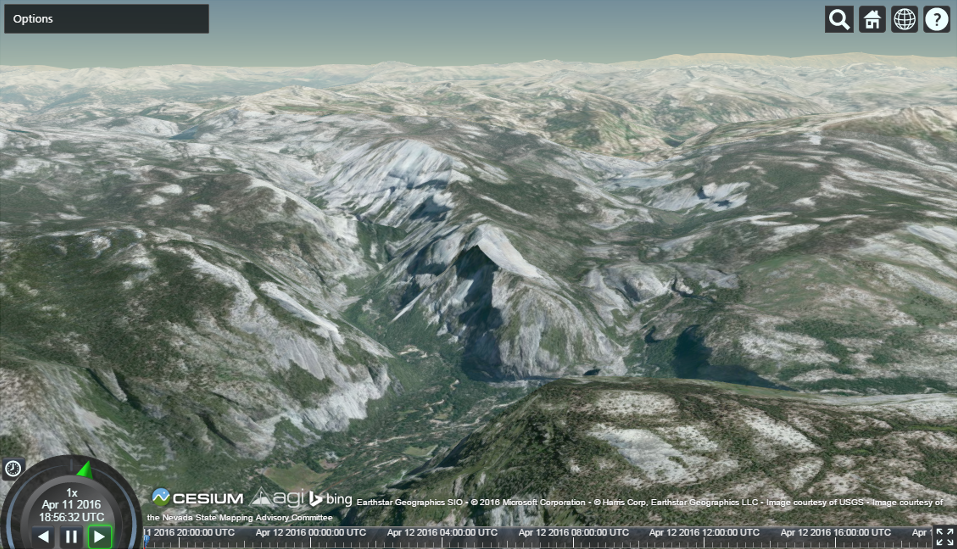
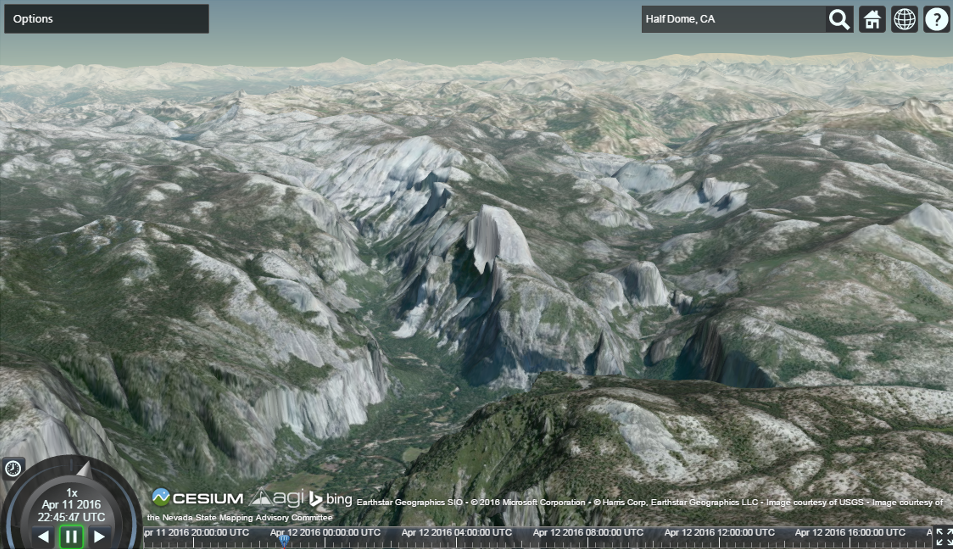
When processing is complete, click the View on globe button to see what the new tileset looks like in Cesium. Use the Cesium Geocoder Widget (Magnifying Glass icon in the top right of the Cesium Viewer), and search for "Half Dome, CA".
The Tileset Viewer provides additional tools for viewing the features constructed by the Terrain Server. Mouse over the Options menu in the top left corner of the viewer to view the visualization options available. A complete list of the View Tileset Options are defined below:
| Option | Description |
|---|---|
| Zoom To | Position the camera view to the bounding extents of a selected DataSource. |
| Wireframe | Render the geometry in wireframe mode, a feature useful for inspecting the underlying geometry of the terrain. |
| Show Tile Coordinates | Displays the XYZ tile coordinates for each individual terrain tile. |
| Suspend LOD Update | Restricts the Tileset Viewer from requesting additional tiles. Once enabled, you are free to zoom closer to tiles without requesting or upsampling higher resolution tiles. |
| Enable Terrain Lighting | Shades the terrain based on the position of the Sun. |
| Enable Watermask | Renders water effects over areas of ocean, as defined by the watermask constructed for this tileset. |
| Show Elevation on Mouseover | Displays latitude, longitude, and elevation of the tiles currently in view under the mouse cursor. |
Enable Terrain Lighting, and slide the control in the timeline widget located at the bottom of the screen. This will change the position of the sun and give control to the shading provided by the terrain lighting feature.
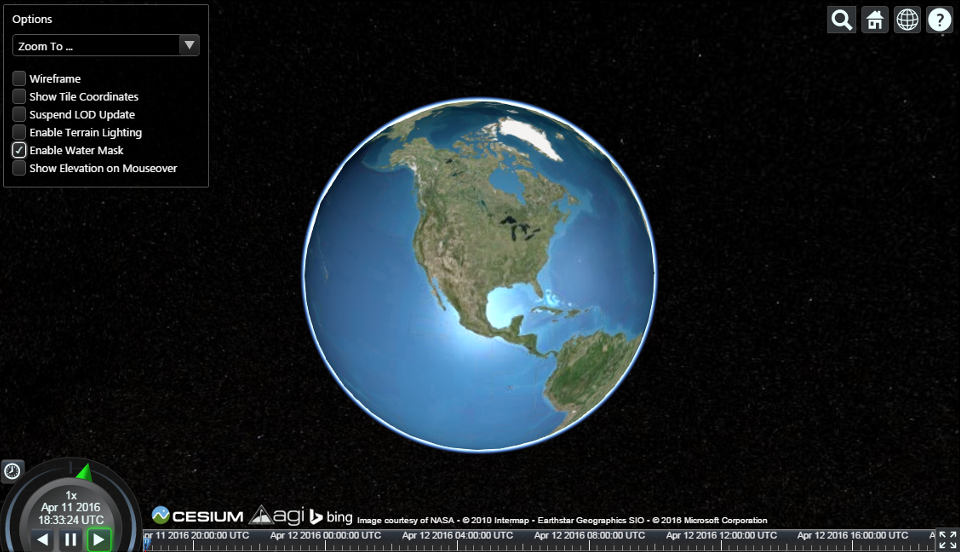
Click on the home button in the upper right corner of the viewer, and then enable the Watermask to see the global water effect rendered over ocean areas. The water effect includes specular highlights, that are also affected by the position of the sun.
So far we’ve imported a single data source and created a tileset from it. More commonly, a tileset is a mosaic of multiple data sources, layered together in a user-defined order. Let’s import another data source, this time containing high-resolution terrain for just a small area.
The National Map Viewer from USGS lets us discover and download data products, including terrain, for the United States. Visit the viewer in your web browser at http://viewer.nationalmap.gov/.
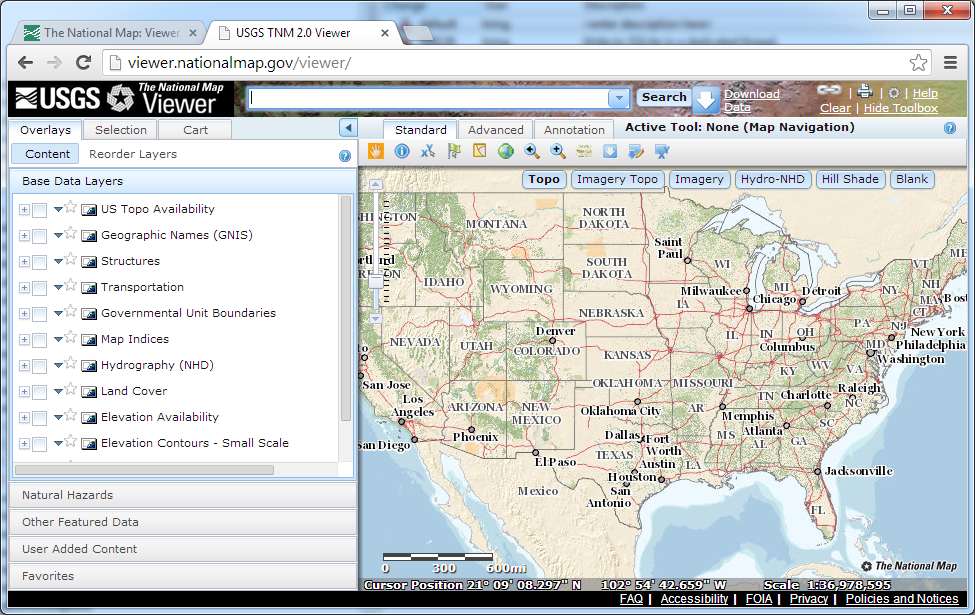
Click the Download Data link at the top of the page, and then click the first link to “draw and download by bounding box.” Draw a bounding box around a small area of the map, preferably somewhere mountainous. A box will appear with the types of data available for download. Check the box next to Elevation and click Next.
A list of National Elevation Dataset data products will appear, offering the terrain data in various resolutions and formats. STK Terrain Server supports all of the formats presented, including ArcGrid, GridFloat, and IMG format, but the IMG format is a bit smaller so that is a good choice. Choose the ones that you would like to download and click Next. The list of products you select will appear in a pane on the left. Click Checkout. You will need to enter your email address and then check your email for links to download the data products you selected.
Download and extract the terrain files, just as we did for GTOPO30. Then, create a new data source in STK Terrain Server and upload the extracted files. National Elevation Dataset terrain files, like GTOPO30, are expressed in meters above mean sea level. In this case, though, we want any voids in the data to be filled by the underlying layer (GTOPO30 in our case) rather than by sampling the mean sea level surface.
Upload the extracted files as we did before, and then include the primary terrain file, usually the largest file, in the data source.
Finally, let’s add the new data source to our Global tileset by clicking the Add button next to the data source on the tileset page.
The data source is added to the list of included data sources above the existing GTOPO30 data source, indicating that the new source will be layered on top of the existing one. Because GTOPO30 has already been incorporated into the tileset, it is not possible to layer it underneath a new layer. New layers can be added to the top of an existing tileset, but not at the bottom or in the middle.
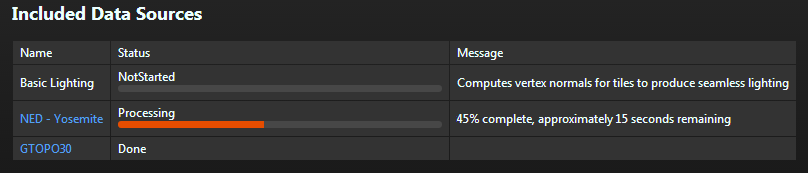
When we click Save, the new data source will be processed and incorporated into the tileset. When it’s finished, click the View on globe button. In the Cesium Viewer, use the Geocoder Widget again to locate "Half Dome, CA" with the new higher resolution Terrain. You can also hover over the Options menu in the top left corner and choose the NED - Yosemite Data Source from the Zoom To drop-down menu to zoom to the bounding extents of the datasource.
We've just covered the core concepts for layering raw terrain input data to construct a Terrain Tileset. With the techniques covered above, you can construct more detailed Terrain Tilesets with your own data. Analytical Graphics, Inc, also maintains the STK World Terrain dataset that can be deployed directly onto your Terrain Server, or used as the foundation for incorporating your own raw terrain data. Contact us today to learn more.