Imagery Overlays |
Insight3D® supports imagery in the following formats: JPEG 2000 (.jp2), ECW (.ecw), ECWP, MrSID (.sid), AGI's Processed Image format (.pdttx), and AGI's Roam Image format (.txm). The JPEG 2000, ECW, ECWP, and MrSID imagery must be in the WGS84 geographic projection. Generally, JPEG 2000 images take up less disk space than PDTTX images, but take slightly longer to load due to more sophisticated decompression. You can create Jpeg2000 files from multiple image formats using Jpeg2000Writer.
Imagery is added in the same way as terrain, as shown in the following example:
GlobeImageOverlay overlay = Scene.CentralBodies.Earth.Imagery.Add(imageryPath);
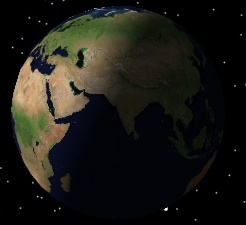
Imagery is drawn on top of existing geometry, which may be the globe's ellipsoid or one or more terrain overlays as shown below.
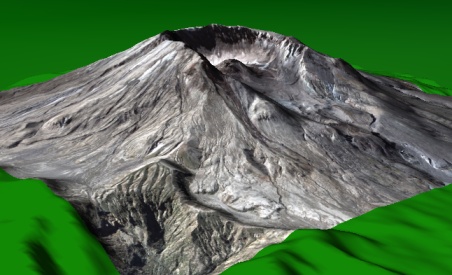 Terrain and imagery overlays | 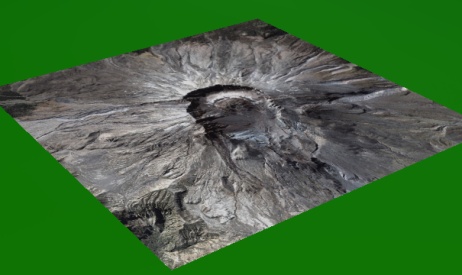 Just imagery overlay |
Images can be blended with images below them by setting their translucency. This is controlled via the Translucency property. A translucency of 0% means the image is completely opaque, while a translucency of 100% means the image is completely transparent.
The following example sets an image's translucency to 40%:
image.Translucency = 0.4f;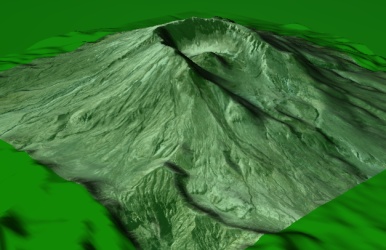
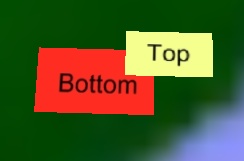
When images overlap each other on the globe, the central body's ImageCollection allows you to control which images are on top and which are below. The collection is ordered so the first image in the collection is rendered on the bottom; each subsequent image is rendered on top of the previous image if their extents overlap. The collection provides IndexOf, Swap, Move methods to order images, as shown in the following example:
GlobeImageOverlay topOverlay = Scene.CentralBodies.Earth.Imagery.Add(topOverlayPath);
GlobeImageOverlay bottomOverlay = Scene.CentralBodies.Earth.Imagery.Add(bottomOverlayPath);

// Since bottom.jp2 was added after top.jp2, bottom.jp2 will be
// drawn on top.  In order to draw top.jp2 on top, we swap the Overlays.
Scene.CentralBodies.Earth.Imagery.Swap(topOverlay, bottomOverlay);
Imagery can have a special role, which can be either base, night or specular. These special images are drawn below all other imagery. A base image is normally used for a base globe texture. A night image is drawn only on the parts of the globe that aren't in sunlight. The specular image is drawn where the specular highlight is shown. This is typically used to dull the highlight on land areas to accentuate the shininess of the oceans.
The following example sets all three of the special images:
GlobeImageOverlay baseOverlay = new GeospatialImageGlobeOverlay(baseUri);
GlobeImageOverlay nightOverlay = new GeospatialImageGlobeOverlay(nightUri);
GlobeImageOverlay specularOverlay = new GeospatialImageGlobeOverlay(specularUri);

Scene.CentralBodies.Earth.BaseOverlay = baseOverlay;
Scene.CentralBodies.Earth.NightOverlay = nightOverlay;
Scene.CentralBodies.Earth.SpecularOverlay = specularOverlay;
 Just base image | 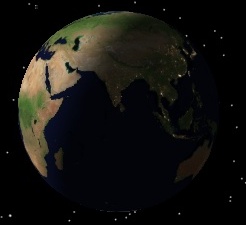 Base and night images | 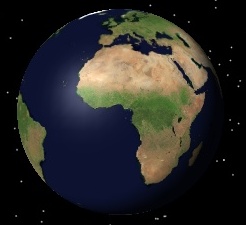 Base and specular images |
Since imagery files can be extremely large, the entire file is not kept in memory. Instead, a small portion of the file is kept in a memory cache. As the camera moves around, parts of the file are paged from disk into the cache. By default, the cache is 64 megabytes. If you are using high resolution imagery or the imagery appears blurry, try increasing the cache to 128 megabytes, or larger, as shown below:
SceneManager.GlobeOverlaySettings.ImageryCacheSize = 128;