Develop in Eclipse |
You want to develop and run your application in Eclipse.
Download the latest version of Eclipse here.
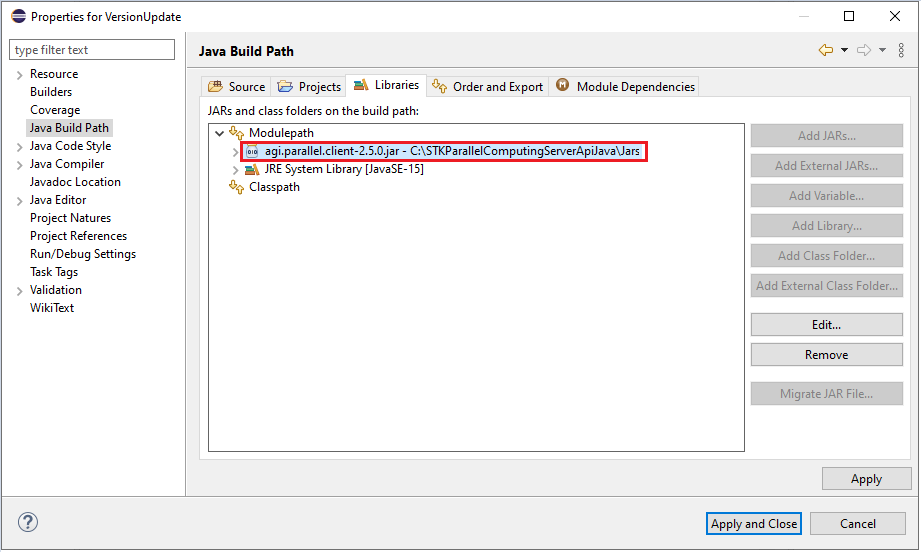
Create a new project. On the Java Settings page, go to the "Libraries" tab and add the agi.parallel.client-[version].jar to the project. It can also be added later by using Project > Properties > Java Build Path > Libraries > Add External JARS
Optionally configure Javadoc. On the "Libraries" tab, expand agi.parallel.client-2.10.0.jar and double click on the Javadoc location.
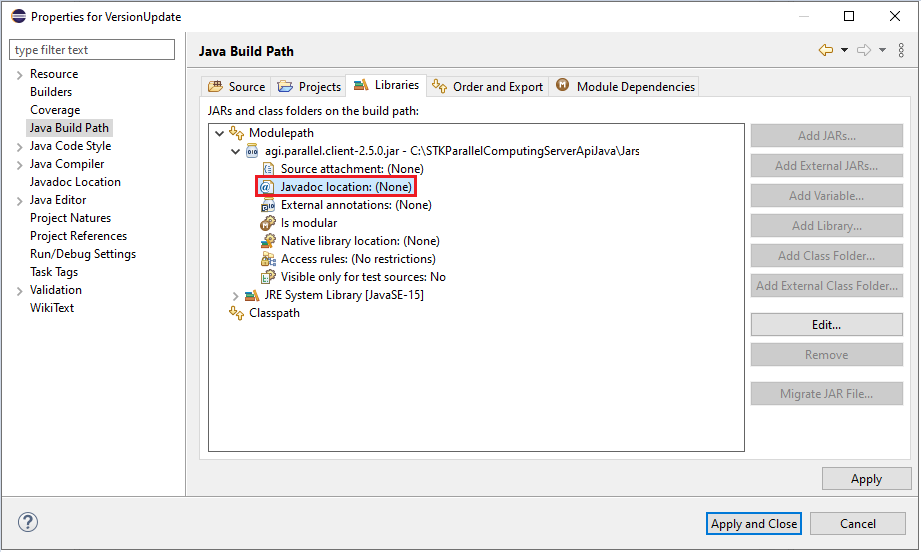
In the Javadoc for 'agi.parallel.client-2.10.0.jar' panel, select the "Javadoc in archive" option and browse to the location of agi.parallel.javadoc-2.10.0.jar. This is located at [PathToSTKParallelComputingServerApiJavaFolder]\Documentation\agi.parallel.javadoc-2.0.0.jar
Copy and paste EclipseWithStkParallelComputingServer.java to the project.
import agi.parallel.client.ClusterJobScheduler;
import agi.parallel.client.IJobScheduler;
import agi.parallel.client.Job;
import agi.parallel.infrastructure.Task;

public class EclipseWithStkParallelComputingServer {
    public static void main(String[] args) {
        try (IJobScheduler scheduler = new ClusterJobScheduler("localhost")) {
            scheduler.connect();
            Job job = scheduler.createJob();
            Task task = new MyTask();
            job.addTask(task);
            job.submit();
            job.waitUntilDone();
            System.out.println("Result = " + task.getResult());
        }
    }

    public static class MyTask extends Task {
        @Override
        public void execute() {
            System.out.println("Line 1");
            System.out.println("Line 2");
            this.setResult("OK");
        }
    }
}
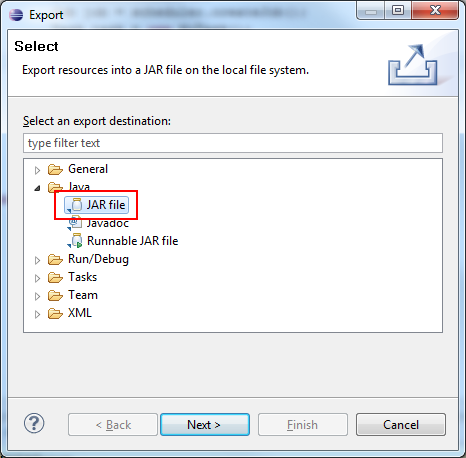
Next, compile the project as a jar and set up Eclipse to run the jar instead of the class files directly.
Go to File > Export > Java > JAR file
Save the jar. Take note of the location of the JAR file that you specified.

To run the application in Eclipse, the jar file needs to be rebuilt every time the source files are updated. For instructions to build the jar automatically, see details in the Discussion section. |
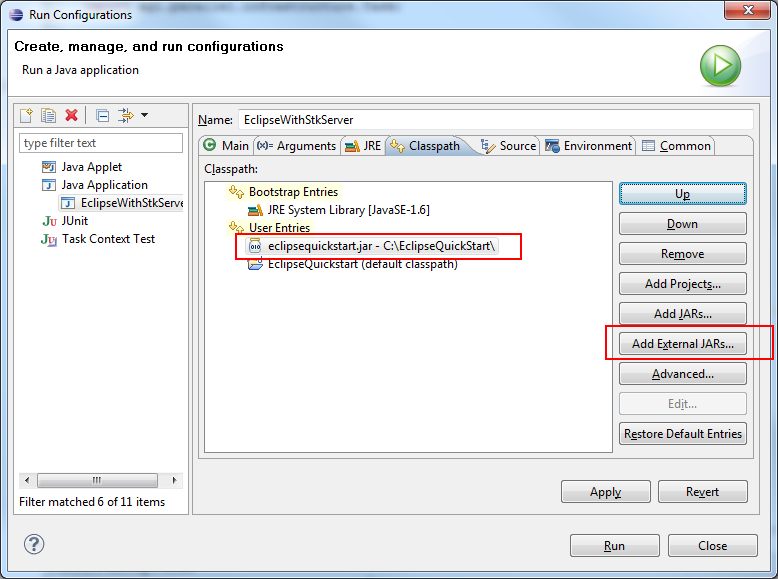
The last step is to make sure that the Run configuration is configured to run the created jar file.
Go to Run > Run Configurations > Java Application. In the "Classpath" tab, click on "Add External Jars" and select the created jar above. Make sure to move the jar to the first entry in "User Entries."
Finally, run the application.
One of the most common questions from developers relates to IDEs and tasks. Although the documentation gives instructions on how to compile applications using the command line, there is no reason IDEs can't be used to develop and debug tasks. The examples included in the developer kit also include Eclipse project files and ant scripts. To run the examples from Eclipse, import the example's project file into the Eclipse workspace.
Eclipse has the capability to automatically rebuild the jar file before every run to avoid the manual process of exporting the jar file each time a source file changes. To autobuild the jar file, run an ant builder that packages the project into a jar after each compilation. In Eclipse, right click on the project and click "Properties". On the properties page, go to the "Builders" tab, and add the ant buildfile. An ant script that can build the jar file will be needed. Included below is an example ant script that can be used as a template.
<project name="EclipseWithStkParallelComputingServer" basedir="." default="package">
  <property name="jar.name" value="EclipseWithStkParallelComputingServer.jar" />

  <property name="output.dir" value="ant" />
  <property name="bin.dir" value="${output.dir}/bin" />
  <property name="dist.dir" value="dist" />

  <target name="clean" description="Clean all generated output.">
    <delete dir="${output.dir}" />
    <delete dir="${dist.dir}" />
  </target>

  <target name="prepare">
    <mkdir dir="${bin.dir}" />
    <mkdir dir="${dist.dir}" />
    <path id="project.classpath">
      <fileset dir="lib" includes="*.jar" />
    </path>
  </target>

  <target name="compile" depends="prepare" description="Compile source code.">
    <javac source="1.8" target="1.8" destdir="${bin.dir}" classpathref="project.classpath" includeantruntime="no">
      <src path="src" />
    </javac>
  </target>

  <target name="package" depends="compile" description="Package the application into a jar, and copy all needed resources to the dist directory.">
    <!-- Copy library jars to the dist directory -->
    <copy todir="${dist.dir}" flatten="true">
      <path refid="project.classpath" />
    </copy>

    <!-- Build the jar file containing the application itself -->
    <copy todir="${bin.dir}">
      <fileset dir="src" excludes="**/*.java" />
    </copy>

    <pathconvert property="manifest.classpath" pathsep=" ">
      <path refid="project.classpath" />
      <flattenmapper />
    </pathconvert>

    <jar destfile="${dist.dir}/${jar.name}">
      <fileset dir="${bin.dir}" />
      <manifest>
        <attribute name="Class-Path" value="${manifest.classpath}" />
        <attribute name="Main-Class" value="EclipseWithStkParallelComputingServer" />
      </manifest>
    </jar>
  </target>

  <target name="run" depends="package" description="Build and run the demo application.">
    <java fork="true" jar="${dist.dir}/${jar.name}" dir="${dist.dir}" />
    <!-- jvmarg line="-Djavax.net.ssl.trustStore=mykeystore.jks" /> -->
  </target>
</project>
Note that the project.classpath property in this ant script is set to the lib directory of the project folder. You will have to copy agi.parallel.client-2.10.0.jar to the lib folder in order to use the ant file to compile and run. |
Before closing the "Edit Configuration" panel, go to the "Targets" tab. On the "Manual Build" and "Auto Build" options, select the ant target that packages the project into a jar file. For the ant script above, this is the package target.
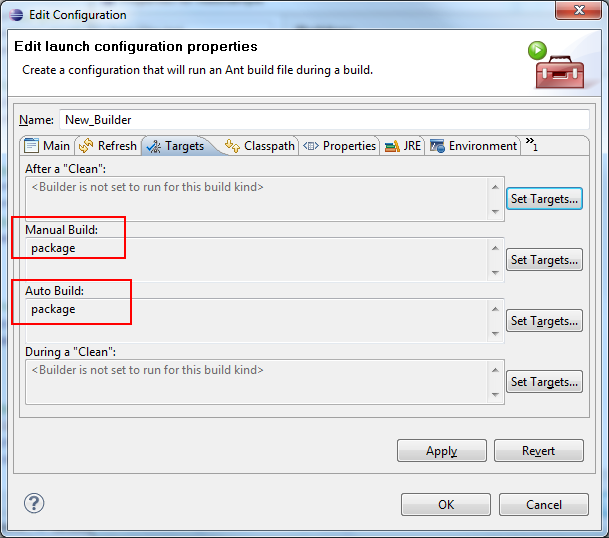
If done correctly, this configures Eclipse to build the jar automatically via ant during every compilation.
If an error is given that the built jar cannot be found when trying to execute your program, try refreshing the project/package explorer view in Eclipse. |