Set up Your Environment for the Cluster Scheduler
Perform these steps to develop applications using the Cluster Job Scheduler.
Note
These instructions are intended to jump start developers during development. When deploying systems in production, please follow the instructions in the separate STK Parallel Computing Server Help System included with the install.
After setting up an environment, consider completing the Programmer’s Guide to learn how to submit jobs to the cluster scheduler.
Overview
Install Coordinator and Agent
Using the STK Parallel Computing Server 2.10 Install, install both the Coordinator and the Agent on the development machine using install.exe.
Note
When starting, running the Coordinator and Agent on the same machine as the development machine is strongly recommended. This help system always hardcodes the Coordinator hostname to localhost. To use a Coordinator installed on another machine, replace localhost with the Coordinator’s IP address or name.
Start the Install and check Coordinator. After the install finishes, the Coordinator will be available on the machine.
Start the Install and check Agent. When prompted for the user setting, specify DOMAIN\USERNAME, e.g. mydomain\username.
After the install finishes, an Agent will be available on the machine.
Install Coordinator and Agent for Linux
Move the STK Parallel Computing Server 2.10 Coordinator and Agent tar files to a directory where you would like to store the Coordinator and Agent.
Unpack the Coordinator tar file using the command “tar -xvf STK_Parallel_Computing_Coordinator_v2.10.tgz” Unpack the Agent tar file using the command “tar -xvf STK_Parallel_Computing_Agent_v2.10.tgz” Open the README.txt files in each of the created Coordinator and Agent directories to guide the rest of the configuration.
Optionally run Coordinator and Agent in Console Mode
Although not strictly required when developing, there are many advantages for running the Coordinator and Agent in console mode rather than as Windows Services:
Easier debugging
Logging is automatically displayed on the console
Restart and shutdown Coordinator and Agent faster
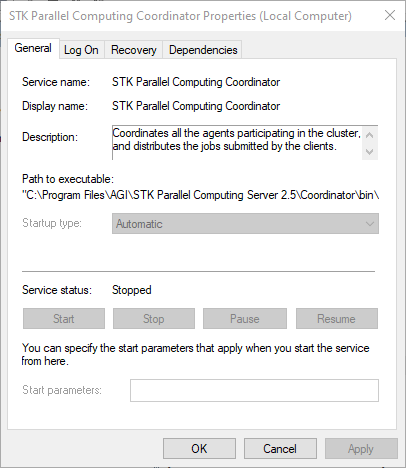
Disable Coordinator and Agent from Automatically Starting
Open Computer Management and find the Coordinator and Agent services. The name for the Coordinator and Agent Windows services are “STK Parallel Computing Coordinator” and “STK Parallel Computing Agent” respectively.
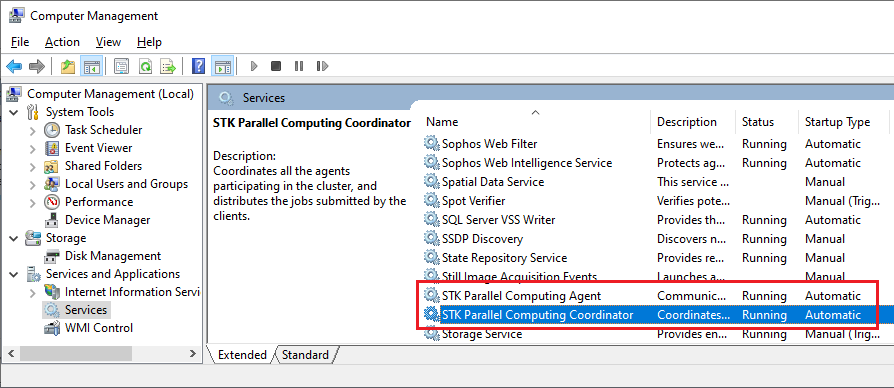
Set the startup type from the default of Automatic to Manual. Do this both for the Coordinator and the Agent.
Start Coordinator and Agent Console Applications
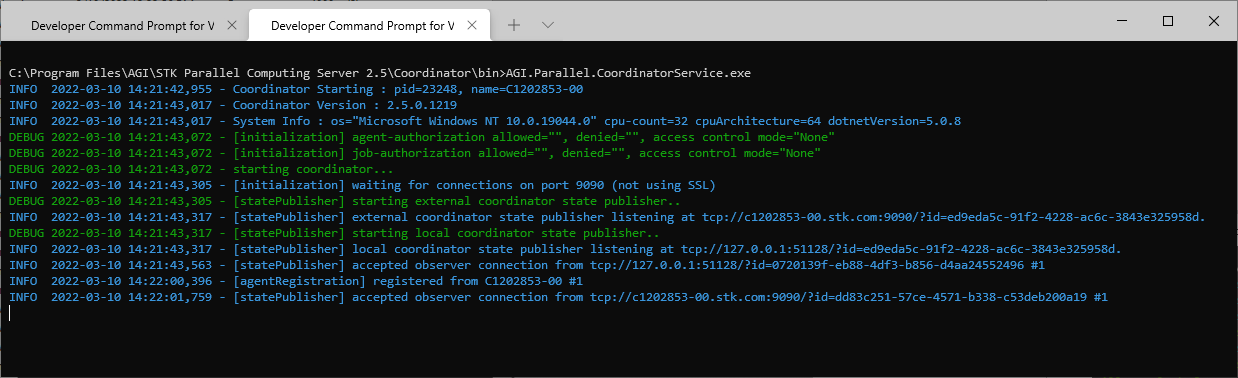
Open a command prompt and start AGI.Parallel.CoordinatorService.exe found in [Install Directory]\Coordinator\bin. e.g. C:\Program Files\AGI\STK Parallel Computing Server 2.10\Coordinator\bin\AGI.Parallel.CoordinatorService.exe
Open a second command prompt and start AGI.Parallel.AgentService.exe found in [Install Directory]\Agent\bin. e.g. C:\Program Files\AGI\STK Parallel Computing Server 2.10\Agent\bin\AGI.Parallel.AgentService.exe

Options in Console Mode
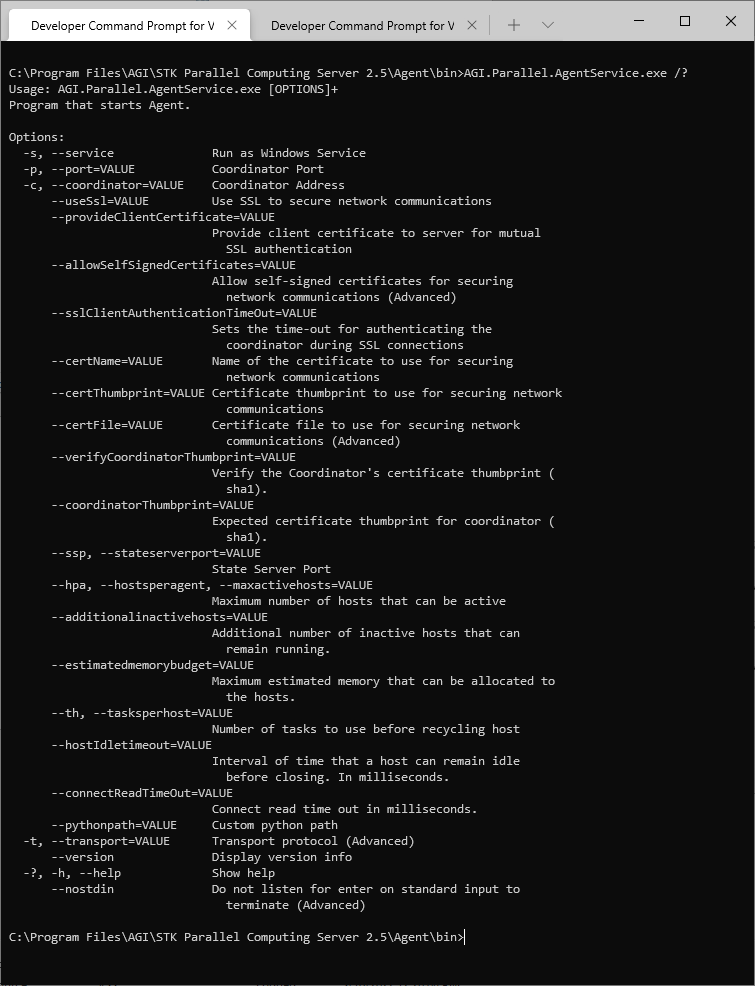
- In console mode, options can be specified via the command line. This is especially useful when starting an agent as an easy way to specify the Coordinator name and the number of hosts to use. To see the options, append the /? flag. e.g.
C:\Program Files\AGI\STK Parallel Computing Server 2.10\Agent\bin\AGI.Parallel.AgentService.exe /?
Setup JetBrains PyCharm
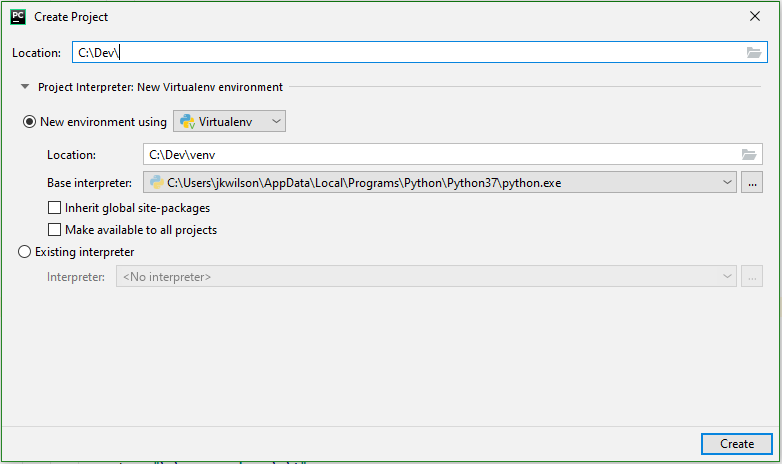
In PyCharm, create a new project.
In the terminal from within the venv directory, use pip to install the agiparallel whl file. The command should look like: (venv) C:\Dev\PythonAPIExample> pip install [full path to whl file]
You can make sure it worked by making a new python file and trying to import agiparallel.
import agiparallel
If there is a red squiggly line under agiparallel, the install did not work or PyCharm cannot find the library. You can manage packages in File > Settings > Project [project name] > Project Interpreter.
Verify Connecting to the Coordinator
The final step to ensure a working development setup is to run a simple program that connects to the coordinator. In a python file in the project folder, copy and paste the code below and run. If everything goes smoothly – congratulations! Everything is setup for developing applications for the cluster scheduler.
from agiparallel.client import ClusterJobScheduler

with ClusterJobScheduler("localhost") as scheduler:
    scheduler.connect()
    print("Congratulations, you can start coding!")
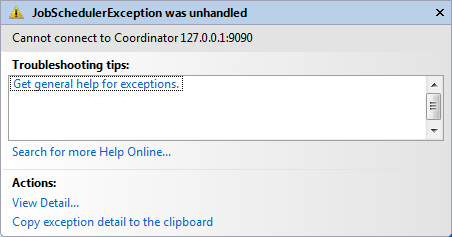
Note
If an exception is thrown at the connect method that says something like “Cannot connect to Coordinator,” the most likely reason is that the Coordinator is not running on the specified machine and port. Make sure the coordinator is running on that machine and confirm a firewall is not blocking the port.