Part 2:
Insert STK Objects
Insert and Configure Objects
Watch the following video, then follow the steps below incorporating the systems and missions you work on (sample inputs provided).
- Model at least one ground site (any type:
 ,
,  ,
,  ).
). - From the Insert STK Objects tool (
 ), select Place () and choose one of the available methods (examples below).
 - From City Database

- In the Insert STK Objects tool (), select Place ().
- Select From City Database from the Select A Method list.
- Click Insert... to bring up the City Database.
- In the City Name text field, enter a city name (e.g. Bloomington).
- Click Search. The matching cities will be shown in the results list.
- Select the result corresponding to the desired Province (e.g. Minnesota) from the list.
- Click Insert.
- Click Close to close the City Database window.
- Search by Address (requires Internet (
 )
) - In the Insert STK Objects tool (), select Place ().
- Select Search by Address from the Select A Method list.
- Click Insert... to bring up the Insert by Address search tool.
- In the search text field, enter an address (e.g. 1600 Pennsylvania Ave, Washington DC).
- Click Search. The matching addresses will be shown in the results list.
- Select the corresponding Result (e.g. White House) from the list.
- Select the desired Color in the lower-left (e.g. White).
- Click Insert.
- Click Close to close the Insert by Address window.
- From the Insert STK Objects tool (), select Facility () and choose one of the available methods (examples below).
- Insert Default
- In the Insert STK Objects tool (), select Facility ().
- Select Insert Default as the Select A Method option.
- Click Insert....
- Right-click the facility () in the Object Browser, and select Rename (e.g. AGI_HQ).
- From Standard Object Database
- In the Insert STK Objects tool (
 ), select Facility ().
 - Select From Standard Object Database as the Select A Method option.
- Click Insert... to bring up the Facility Database.
- In the Name text field, enter a Site Name (e.g. Guam 2).
- Click Search. The matching facilities are displayed in the Results list.
You may see duplicate results. Scroll to the right to see the Source. If an internet connection exists, results will display from both AGI's Standard Object Database (requires internet) and the Local Database. If no internet connection exists, STK will only search the local database.
- Select the corresponding result (e.g. Guam 2 GU2 Leolut) from the list.
- Click Insert.
- Click Close to close the Facility Database window.
- From the Insert STK Objects tool (), select Target () and choose one of the available methods (example below).
- Insert Default
- In the Insert STK Objects tool (), select Target ().
- Select Insert Default as the Select A Method option.
- Click Insert...
The default target object is located at zero (0) degrees latitude and zero (0) degrees longitude.
- Center your 3D view on a ground site (, , ).
- In the STK Object Browser, right-click on a ground site (, , ) and select Zoom To.
- Use the Home View (
 ) button to reset the 3D view.
- Model at least one moving vehicle (any type:
 ,
,  ,
,  ).
). - From the Insert STK Objects tool (), select Satellite () and choose one of the available methods (examples below).
- Search From Standard Object Database
- In the Insert STK Objects tool (), select Satellite ().
- Select the From Standard Object Database as the Select A Method option.
- Click Insert... to bring the Standard Object Database to the front.
- In the Name or ID text field, enter a Satellite Name or ID (e.g. Geoeye).
- Click Search. The matching satellite are shown in the Results field.
You may see duplicate results. Scroll to the right to see the Source. If an internet connection exists, results will display from both AGI's Standard Object Database (requires internet) and the Local Database. If is no internet connection exists, STK will only search the local database.
Click on the Advanced... button for more Insert options. Here you can choose the analysis time period, the propagation step size and TLE source.
- Select the corresponding result (e.g. Official Name=GeoEye 1) from the list.
- Click Insert.
- Click Close to close the Satellite Database window.
- Design an Orbit with the Orbit Wizard.
- In the Insert STK Objects tool (), select Satellite ().
- Select Orbit Wizard as the Select A Method option.
- Click Insert... to bring the Orbit Wizard to the front.
- Select an orbit Type (e.g. Circular).
- Set the Satellite Name (e.g. CircularSat).
- Enter the desired parameters in the Definition area (e.g. RAAN 160 deg).
- Click OK to insert the satellite into the scenario and close the Orbit Wizard window.
- Insert a Satellite from an Archived Database
- Obtain an Archived Satellite Database.
- Open the Scenario's (
 ) properties (
 ).
). - Select the Basic - Database page.
- Click the Update Database Files... button.
- Select the Obtain Archived Database option.
- Specify the Archive Date by entering it in the text field or using the drop-down menu.
- Click the Update button. If an archive is not available for the specified date, the archive for the next newest data is used instead.
- Insert Satellite from an Archived Satellite Database.
- From the Insert STK Objects () menu, select the Satellite () object on the left.
- Select the From TLE File method.
- Click the Insert... button.
- Navigate to the archived satellite database file (e.g. C:\ProgramData\AGI\STK 11(x64)\Databases\Satellite) and select the updated file (e.g. stkAllTLE.tce).
- Click Open.
- Click the Modify... button.
- Disable the On propagation, automatically retrieve elements option.
- Click OK.
- Use the Common Name and SSC Number fields to search through the archived database.
- Select the desired satellite in the results list and click Insert.
- Click Close to close the Insert From Satellite Database Window.
- Model an Aircraft () using one of the options below.
- Typing in Waypoints
- In the Insert STK Objects tool (), select Aircraft ().
- Select Define Properties as the Select A Method option.
- Click Insert... to bring the Properties Browser to the front.
- Click Insert Point twice to add two waypoints manually.
- Enter values for the second waypoint (e.g. Lat = 10 deg, Lon = 10 deg).
- Click OK to dismiss the Properties Browser.
- Clicking the Waypoints in the 2D Graphics window.
- Zoom In and Pan the 2D Graphics window so the desired route area is in view.
- You cannot Pan in the 2D Graphics window while the Properties Browser is open. Every click is added as a waypoint.
- In the Insert STK Objects tool (), select Aircraft ().
- Select Define Properties as the Select A Method option.
- Click Insert... to bring the Properties Browser to the front.
- Move the aircraft Properties Browser next to the 2D Graphics Window.
- Click anywhere in the 2D Graphics window to add new waypoints (latitude/longitude values) in the waypoint table.
- You can click "delete point" if you want to remove any waypoints.
- Click OK to dismiss the properties browser.
- Clicking the Waypoints in the 3D Graphics window.
- In the Insert STK Objects tool (), select Aircraft ().
- Select Define Properties as the Select A Method option.
- Click Insert... to bring the Properties Browser to the front.
- Close the Properties Browser.
- Bring the 3D Graphics window to the front.
- Select the new aircraft in the 3D Object Editing toolbar (
 )
) - Click the Object Edit Start (
 ) button to start the object editor.
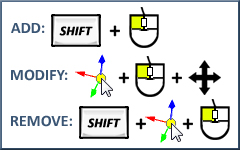
 - Add, modify, or remove waypoints directly in the 3D Graphics window:
- If you want to start over, click the Cancel (
 ) button, then start editing again.
 - When you finish, click the Object Edit Accept (
 ) button.
- Model a Missile () using one of the options below.
- Typing in the Launch and Impact locations.
- In the Insert STK Objects tool (), select Missile ().
- Select Define Properties as the Select A Method option.
- Click Insert... to bring the Properties Browser to the front.
- Enter values for the Impact location (e.g. Lat = -20 deg, Lon = -20 deg).
- Click OK to dismiss the Properties Browser.
- Clicking the Launch and Impact Locations in the 2D Graphics window.
- Zoom In and Pan the 2D Graphics window so the desired launch and impact points are in view.
- You cannot Pan in the 2D Graphics window while the Properties Browser is open. Every click is considered a launch or impact point.
- In the Insert STK Objects tool (), select Missile ().
- Select Define Properties as the Select A Method option.
- Click Insert... to bring the Properties Browser to the front.
- Click in the 2D map to edit the launch location.
- Click OK to dismiss the warning box that explains the delta V changed.
- Click in the 2D map to edit the impact location.
- Click OK to dismiss the Properties Browser.
- Center your 3D view on an STK Vehicle (, , ).
- In the STK Object Browser, right-click on a vehicle (, , ) and select Zoom To.
- Click Reset (
 ) to reset the animation time.
 - To slow down the animation, click the Decrease Time Step (
 ) button.
 The current time step is in the lower-right corner of the STK GUI.
- Click Play (
 ) to watch the vehicle move along its path.
 - Use the Home View () button to reset the 3D view to center the Earth.
- Add an interval to your Timeline View for an STK vehicle (, , ).
- If your Timeline View is not open, extend the STK View menu and select Timeline View.
- In the Timeline View toolbar, select Add Time Components (
 ).
). - Select the STK vehicle object on the left (e.g. Aircraft1).
- Select any time interval on the right (e.g. EphemerisTimeSpan) and click OK.
- Right-click on the new interval in the Timeline View and select Center.
- Use the gray slider bar (
 ) to scroll through the time intervals.
 - Right-click on the Scenario availability interval (top row) and select Center.
- Close the Timeline View to de-clutter screen.
- Model a Sensor (
 ) on at least one ground site and each moving object.
 - Insert a Sensor () on a ground site (any type: , , ).
- In the Insert STK Objects tool (), select Sensor ().
- Select Insert Default as the Select A Method option.
- Click Insert... to bring the Select Object window to the front.
- Select a ground site (any type: , , ) in the Select Object window (e.g. Bloomington).
- Click OK.
- Insert a Sensor () on a vehicle (any type: , , ).
- In the Insert STK Objects tool (), select Sensor ().
- Select Insert Default as the Select A Method option.
- Click Insert... to bring the Properties Browser to the front.
- Select a vehicle (any type: , , ) in the Select Object window (e.g. CircularSat).
- Click OK.
You can import a KML file and use it as an STK Object. Open the Globe Manager ( ) and select the KML tab. You can import
your own KML here or browse to <STK install folder>/Help/stktraining/KML/MtStHelens.kmz.
) and select the KML tab. You can import
your own KML here or browse to <STK install folder>/Help/stktraining/KML/MtStHelens.kmz.
When you insert a satellite from the Standard Object Database, the database uses
the most current TLE data available. If you're working in an offline environment,
you can download all current and archived satellite databases on AGI's website at http://www.agi.com/resources/satdb/satdbpc.aspx.
Don't forget to save your work!
 ), sea (
 ), air (
 Visit AGI.com