All features supporting the SysML v2 BETA specification are currently ALPHA and subject to change. The final SysML 2.0.0 specification is expected to be officially adopted in the second half of 2025. While there have been many questions during the finalization, we believe this implementation provides enough value for early adopters to start preparing to create and execute models using the new specification. We will be expanding support for the specification through finalization, into SysML v2.1, and beyond. There are a small number of remaining issues related to execution scheduled for revision in SysMLv2.1. We will be expanding and clarifying support for SysML v2.x throughout the upcoming language revision process. Consult the What's New and Modeling with SysML v2 pages for more information about what is currently supported.
Project Organization
Regardless of what IDE you use, you should set up your project directory first. You can put the directory for your delegate module source code anywhere, but it typically makes sense to keep it alongside your model configuration file, the location you want to deploy your built delegate module to, and any other project-related files like an Ansys Systems Tool Kit® (STK®) application scenario. Figure 1 shows this organization for a completed tutorial sample included in the Behavior Execution Engine installation.

Figure 1: A tutorial sample project directory
Inside your delegate source code directory, you should also follow the pattern used by the samples:
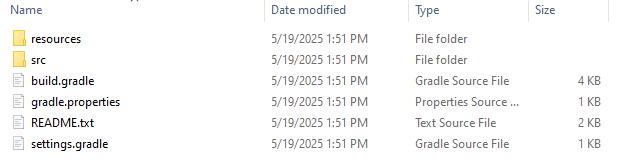
Figure 2: A tutorial sample delegate source code directory
- To set up an environment for development, you can copy the contents of the samples\sysml2\build directory from the Behavior Execution Engine installation into your delegate source code directory. After you create a delegate module provider for your module, copy the class's fully qualified name into the \resources\META-INF\services\com.agi.mbse.sysml2.spi.DelegateModuleProvider file.
- Import your project into your IDE, using the instructions in the developer environment section, and then return here to finish configuring Gradle.
- In your IDE, open the gradle.properties file.
-
Set the
com.agi.mbse.installDirproperty to the path to your Behavior Execution Engine installation (e.g., C:/Program Files/AGI/Behavior Execution Engine). -
Set the
com.agi.mbse.delegateModuleDirproperty to the location you want to deploy your delegate module to. This should be a project-relative directory (e.g., ../delegates) or your delegate module home directory (e.g., C:/BehaviorExecutionEngine/DelegateHome). -
If you plan to use STK classes in your delegates, set the
com.agi.mbse.stkInstallDirproperty to the path to your STK installation (C:/Program Files/AGI/STK_ODTK 13 by default); otherwise, you can ignore this property.Ansys Systems Tool Kit® (STK®) application-related features are only available if you acquired Behavior Execution Engine as part of the STK Enterprise application or otherwise have a valid license for the STK application. If you acquired Behavior Execution Engine as part of the Ansys ModelCenter® Enterprise application but have access to a valid STK license, contact us for access to the STK application-related features.
- Save the file, if your IDE does not do that automatically, and close it.
- Open the settings.gradle file.
-
Set the
rootProject.nameproperty to the name of your delegate module project. - Save the file, if your IDE does not do that automatically, and close it.
You should now be ready to start writing delegate modules. The Gradle build script provides one task in particular that you should be aware of:
- You can use the install task to build and deploy your delegate module.