STK Java API - Configuring the Samples with the Eclipse
IDE
The following instructions explain how to configure the STK Java
API code samples provided in the STK install within the Eclipse
Integrated Development Environment (IDE).
Note: On windows the code samples
included in the STK install are read only. You must copy the
appropriate directory (<STK install
folder>\CodeSamples) to an area on the local machine
where you have write permissions, and then mark the files writable
before trying to compile them. Use the directory you chose instead
of <STK install folder>\CodeSamples in the
following instructions.
- Refer to the getting/installing
Eclipse if you do not already have Eclipse installed on your
machine. DO NOT create a new Eclipse Java application
project.
- Start up the Eclipse IDE.
- When asked to select a Workspace, browse to the
<STK
install folder>\CodeSamples directory. Where
<STK install folder> is the current release
installation of STK / STK Engine.
- Click the OK button.

Note: If the Eclipse IDE launches
without displaying the above dialog, open the File menu and select
Switch Workspace to display it, then browse to the above
directory.
- Close the Eclipse IDE's Welcome screen.
- In Eclipse, left-click on the Window menu bar item.
- Left-click on the Preferences menu item.
- In the Preferences dialog, choose General -> Workspace
-> Linked Resources.
- Left-click on the New... button.
- In the New Variable dialog, type JavaDevKit in the Name text
field.
- Next left-click the Folder... button and in the folder
selection dialog select your <STK_INSTALL_DIR>/bin folder and
click the OK button.
- Choose one of the following to set up samples; otherwise, skip
to step 13:
-
- To set-up the SWT samples:
-
- Left-click on the New... button.
- Name this variable SwtJar and left-click on the File...
button.
- Browse to
<STK_INSTALL_DIR>/CodeSamples/SharedResources/Java/SharedResources/ThirdParty/eclipse4.2/lib
folder and select the jar file matching your OS Platform and
Architecture.
- To set-up the JavaFX samples for JDK 1.7.0_*:
-
- Left-click on the New... button.
- Name this variable JavaFXJar and left-click on the File...
button.
- Browse to and select <JAVA_HOME>/jre/lib/jfxrt.jar.
- Left-click on the New... button.
- Name this variable JavaFXSwtJar and left-click on the File...
button.
- Browse to and select <JAVA_HOME>/jre/lib/jfxrt.jar. Note:
this points to the same jar on purpose to prevent a buildpath error
because there are separate jar files in JDK 1.8.0.
- To set-up the JavaFX samples for JDK 1.8.0_*:
-
- Left-click on the New... button.
- Name this variable JavaFXJar and left-click on the File...
button.
- Browse to and select
<JAVA_HOME>/jre/lib/ext/jfxrt.jar.
- Left-click on the New... button.
- Name this variable JavaFXSwtJar and left-click on the File...
button.
- Browse to and select <JAVA_HOME>/jre/lib/jfxswt.jar.
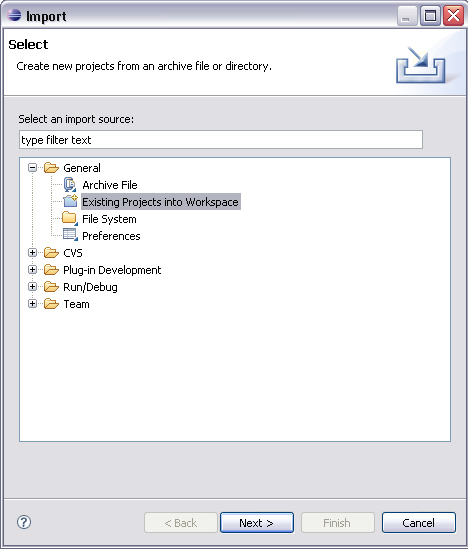
- From the File menu, select
Import...
- In the Import dialog, open the General folder.
- Select Existing Projects into Workspace.
- Click the Next button.
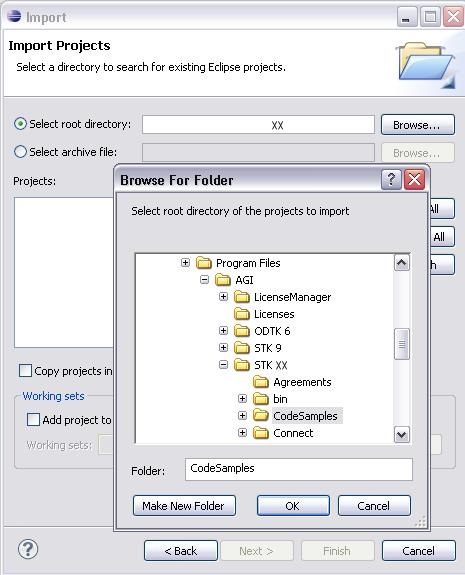
- Choose Select root directory.
- Click the Browse button.
- Do NOT change the directory; instead, just
click the OK button to dismiss the Browse for Folder dialog.
- Make certain that the projects shown in the image
below are selected in the Projects area.
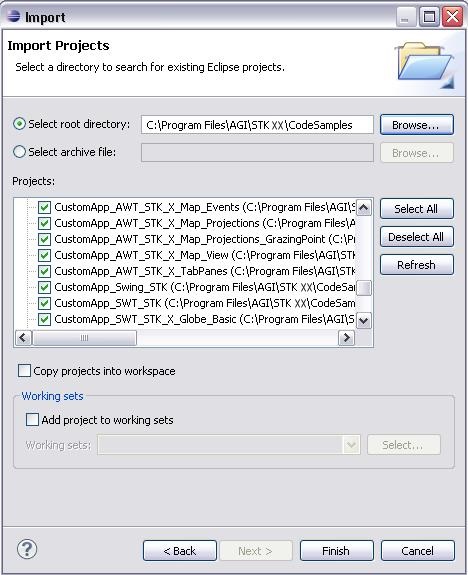
- Click the Finish button.
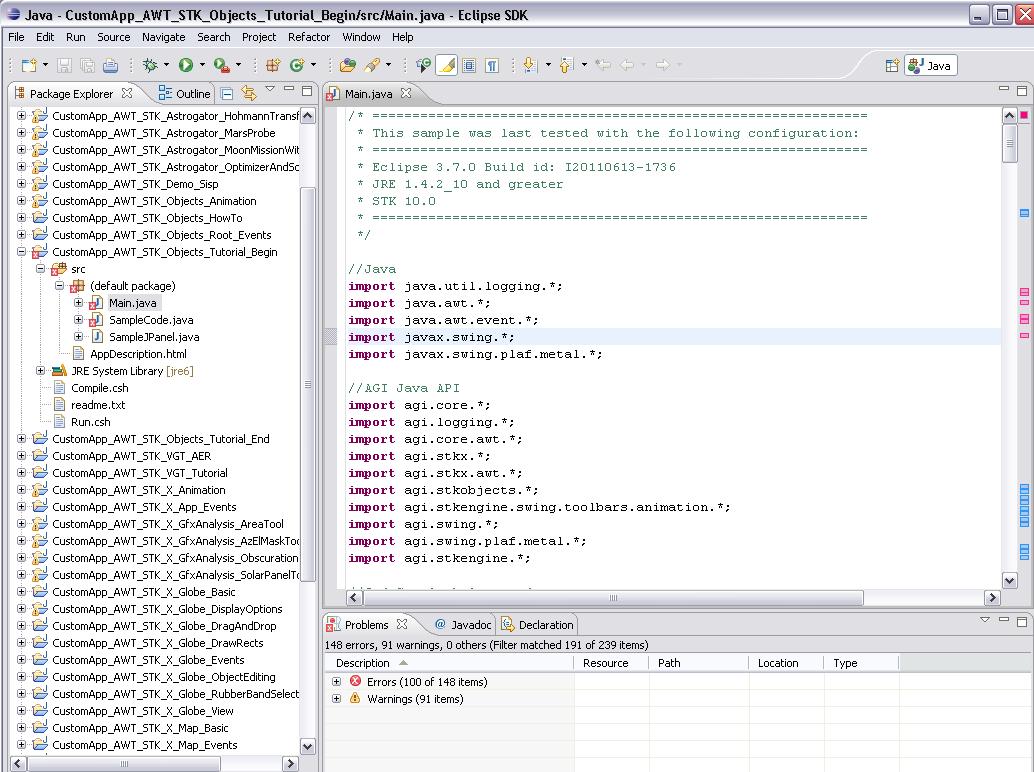
- By default most of the samples are pre-configured out of the
box to begin to compile and start if STK was installed to the
default location/settings and you have set up the workspace
resources.
- Note that some projects will not compile, namely the
STK_X_Eclipse_Plugin and STK_X_Eclipse_RCP. The errors in
STK_X_Eclipse_Plugin and STK_X_Eclipse_RCP are because additional
steps are required for their set-up.
- If you see any Samples with compilation error icons, check the
following:
-
If the errors are in all of the projects then check that the
JavaDevKit Linked Resource is set to the correct directory.
If the errors are only in the SWT projects then check that the
SwtJar Linked Resource is set to the correct file.
If the errors are only in the JavaFX projects then check that
the JavaFXJar Linked Resource is set to the correct file.
Open each project's properties and verify the Java Build
Path does not have any unresolved errors.
- Click the Libraries tab, and note the jar libraries
have a javadoc location are set to the default javadocs library. If
not set properly, follow the steps in configuring an Eclipse
project with the STK Java API javadoc intellisense.
-
Tip: Some of the following steps may require
editing of the project's Properties. Before performing such
editing, you may want to make sure that the file is writable. See
the section on Saving Project Settings at the
end of this page.
- If you have changed any settings on the Properties
page, click OK to save the settings and dismiss the page.
- Check to see if the samples have already been compiled. The
Eclipse IDE automatically compiles Java files when they are added
or changed within a project. Open the Project menu and see whether
a check mark appears next to the Build Automatically item. If so,
the samples have been compiled, and you can skip the next
step.
- If the samples have not yet been compiled, then right-click on
the current project you are working with in the Package Explorer
and select Build Project.
Set .classpath file to
writable if necessary for saving project settings
To make certain that you will be able to save any changes you
make to the project's Properties page, find the .classpath file for the Eclipse project and verify
that they are writable.
If you do not see the .classpath
file in the Eclipse project directory...
- On Windows ...
- Open Windows Explorer.
- Hit the alt key on the keyboard.
- Select Folder Options from the Tools menu.
- Click the View tab.
- Select the "Show hidden files and folders" option.
- On Linux ...
- Open a terminal window.
- Browse to the folder containing the .classpath file.
- Run the command: ls -a
STK Programming Interface 11.0.1